| Anonymous ftp to: | ftp.roe.ac.uk |
| Directory: | /pub/acd/catalogues |
| File: | photostandards.tar.Z |
The file is a compressed tar archive; remember to use ftp in binary mode. Brief details of retrieving, decompressing and extracting the catalogues follow.
- (a)
- To start ftp type:
Reply ‘
anonymous’ to theNameprompt and give your electronic mail address as the password. Then type:(Note that messages from the ftp commands have been omitted and ‘ftp>’ is the ftp prompt rather than something that you type in.) Once the file has been retrieved type ‘
quit’ to leave ftp. The filephotostandards.tar.Zshould have been created in your current directory. Note the use of thebinarycommand to set ftp to the appropriate mode for retrieving non-text files. If you encounter problems with ftp then seek assistance from your site manager in the first instance. There is now a veritable plethora of books about using computer communications networks. However, one which gives a good description of the ftp utility is The Whole Internet User’s Guide and Catalog by Krol[48]. - (b)
- File
photostandards.tar.Zis a compressed tar archive. It must be decompressed before it can be used. Type: - (c)
- To extract all the files in the archive type:
Subdirectory
photostandardsshould be created in your current directory. Filephotostandards/0CATALOGUES.LISgives details of the catalogues available. The Landolt (1992) catalogue is file:The name of the subdirectory refers to the numbering of the catalogue by the CDS. The catalogue is in the CURSA Small Text List (STL) format for which the file type is
.TXT(or.txt). - (d)
- Finally, move a copy of the catalogue to a convenient directory and make this directory your current directory.
A message similar to the following should appear.
xcatview a GUI-based catalogue browser which can be used to
select standard stars that match your criteria. To start it, ensure that your terminal is configured
to receive X-output, then type:
(The ‘&’ merely makes xcatview run as a detached process so you can, if you so desire, continue
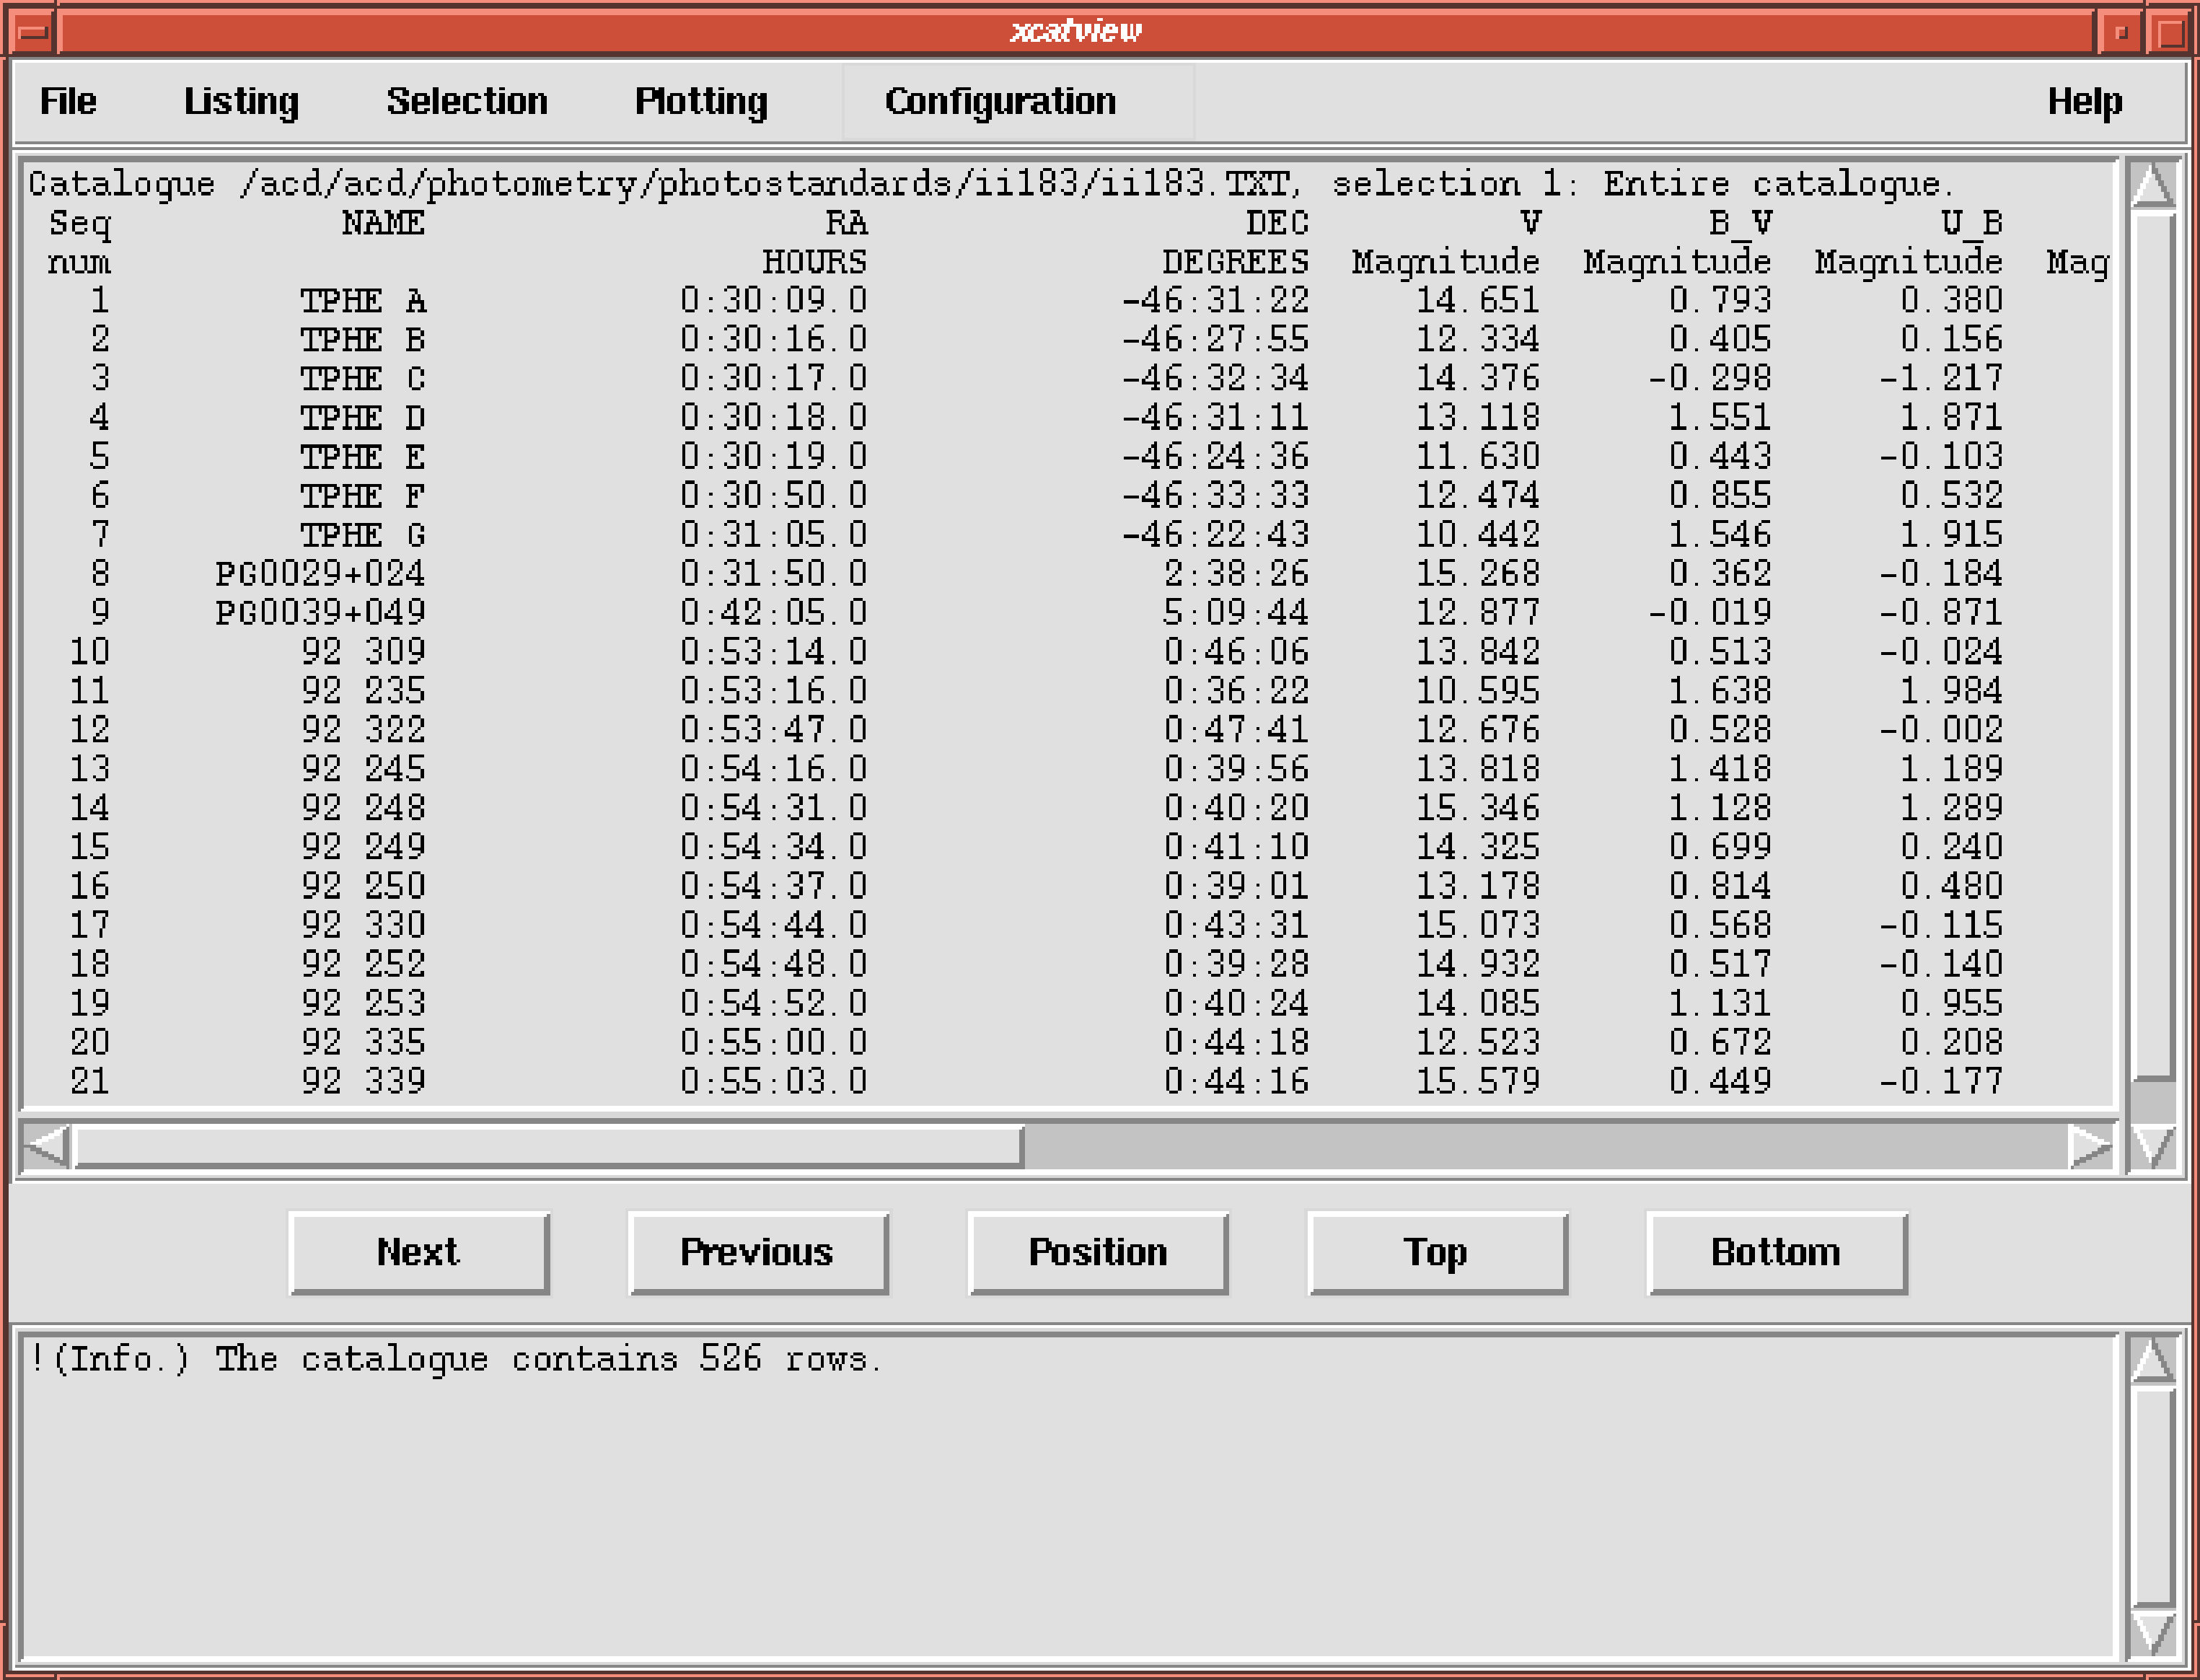
to issue Unix commands from the command line.) A window similar to Figure 6 should appear.
Use the Select Catalogue window to open catalogue ii183.TXT. The Open Catalogue window is
similar to the file-selectors often found in GUI-based applications and if you have used similar
ones you should not have any difficulty using it. However, in case of difficulty, click on the Help
button for assistance. The catalogue should open and the appearance of xcatview should be
similar to Figure 7.
You can, if you wish, use the various functions in xcatview to browse the catalogue.
Note that all the windows in xcatview contain a Help button which can be clicked for
assistance.

xcatview main display area (see Figure 7).
Alternatively, you can list all the column names by clicking on the Listing menu in the
bar at the top of the xcatview window and choosing the Show summary of columns
option.
In CURSA you can calculate new columns ‘on the fly’ by specifying algebraic expressions
involving existing columns. Thus, if you had columns called X and Y you could specify
_’), so the
column names become B_V and U_B. The columns in catalogue ii183.TXT follow this
convention.
V
magnitude in the range 12 to 15,
B−V
colour in the range 0.5 to 1.5,
Right Ascension in the range 15h
to 20h,
the star was observed more than 7 times.
To generate a selection click on the Selection button in the bar at the top of the xcatview window
and choose the Create a new selection option. A new window will appear allowing you to specify
the required selection. Enter:
and click on the OK button. This operation selects stars in the magnitude range 12<V<15. Repeat the procedure to further refine the selection by limiting the range of colours, Right Ascension and number of observations. The selections to enter are:
Note that in order to indicate that the Right Ascension is being specified
as sexagesimal hours the value is entered unsigned and with a colon
(‘:’) to separate the minutes and seconds. CURSA interprets an unsigned
sexagesimal value in this format as hours. A signed sexagesimal value is
similarly interpreted as degrees. Thus positive angles in sexagesimal degrees
must be preceded by a plus sign. See SUN/190[16] for further details.
Alternatively, if you prefer, you can generate the required selection in one go by entering all the
criteria in a single selection, with the individual elements separated by ‘AND’. However, it is
probably easier to make typing mistakes this way. Whichever way the selections are specified
you should finally select 24 standard stars.
Click on the Listing button in the bar at the top of the xcatview window and choose the Choose
the columns to be listed option. A new window appears which allows you to choose the required
columns. Use it to select the above set of columns. Click on the Help button in case of
difficulties and on OK when you have selected the required columns. Subsequently,
only the chosen columns will be listed on the screen, written to output catalogues
etc.
xcatview window and choose the Save as catalogue option. A new window will appear. Enter
the required file name, perhaps:
Note that CURSA uses the file type to recognise the format in which the catalogue is to be
written. The most appropriate format for these small lists is the Small Text List (STL) format, for
which the corresponding file type is ‘.TXT’ or ‘.txt’. Also set the Columns button to current list
(otherwise all the columns in the catalogue will be written). Then click on the OK button. A
catalogue called mystandards.TXT containing the selected standard stars should be written in
your current directory.
xcatview window and choose the Save as text file option. Enter the required file
name, perhaps:
set the other options as required and click on the OK button. File mystandards.lis will be
written in your current directory. It is suitable for printing out, editing etc.
and enter the required details. A series of plots and graphs are generated. You can use this output to arrive at a final list of fifteen to twenty standards. You would, of course, probably also use OBSERVE to check the visibility of your programme objects.