The first command starts CCDPACK, the second starts the xreduce GUI. The ampersand (‘&’)
runs xreduce as a detached process, so that you can continue to issue Unix commands from the
terminal window.
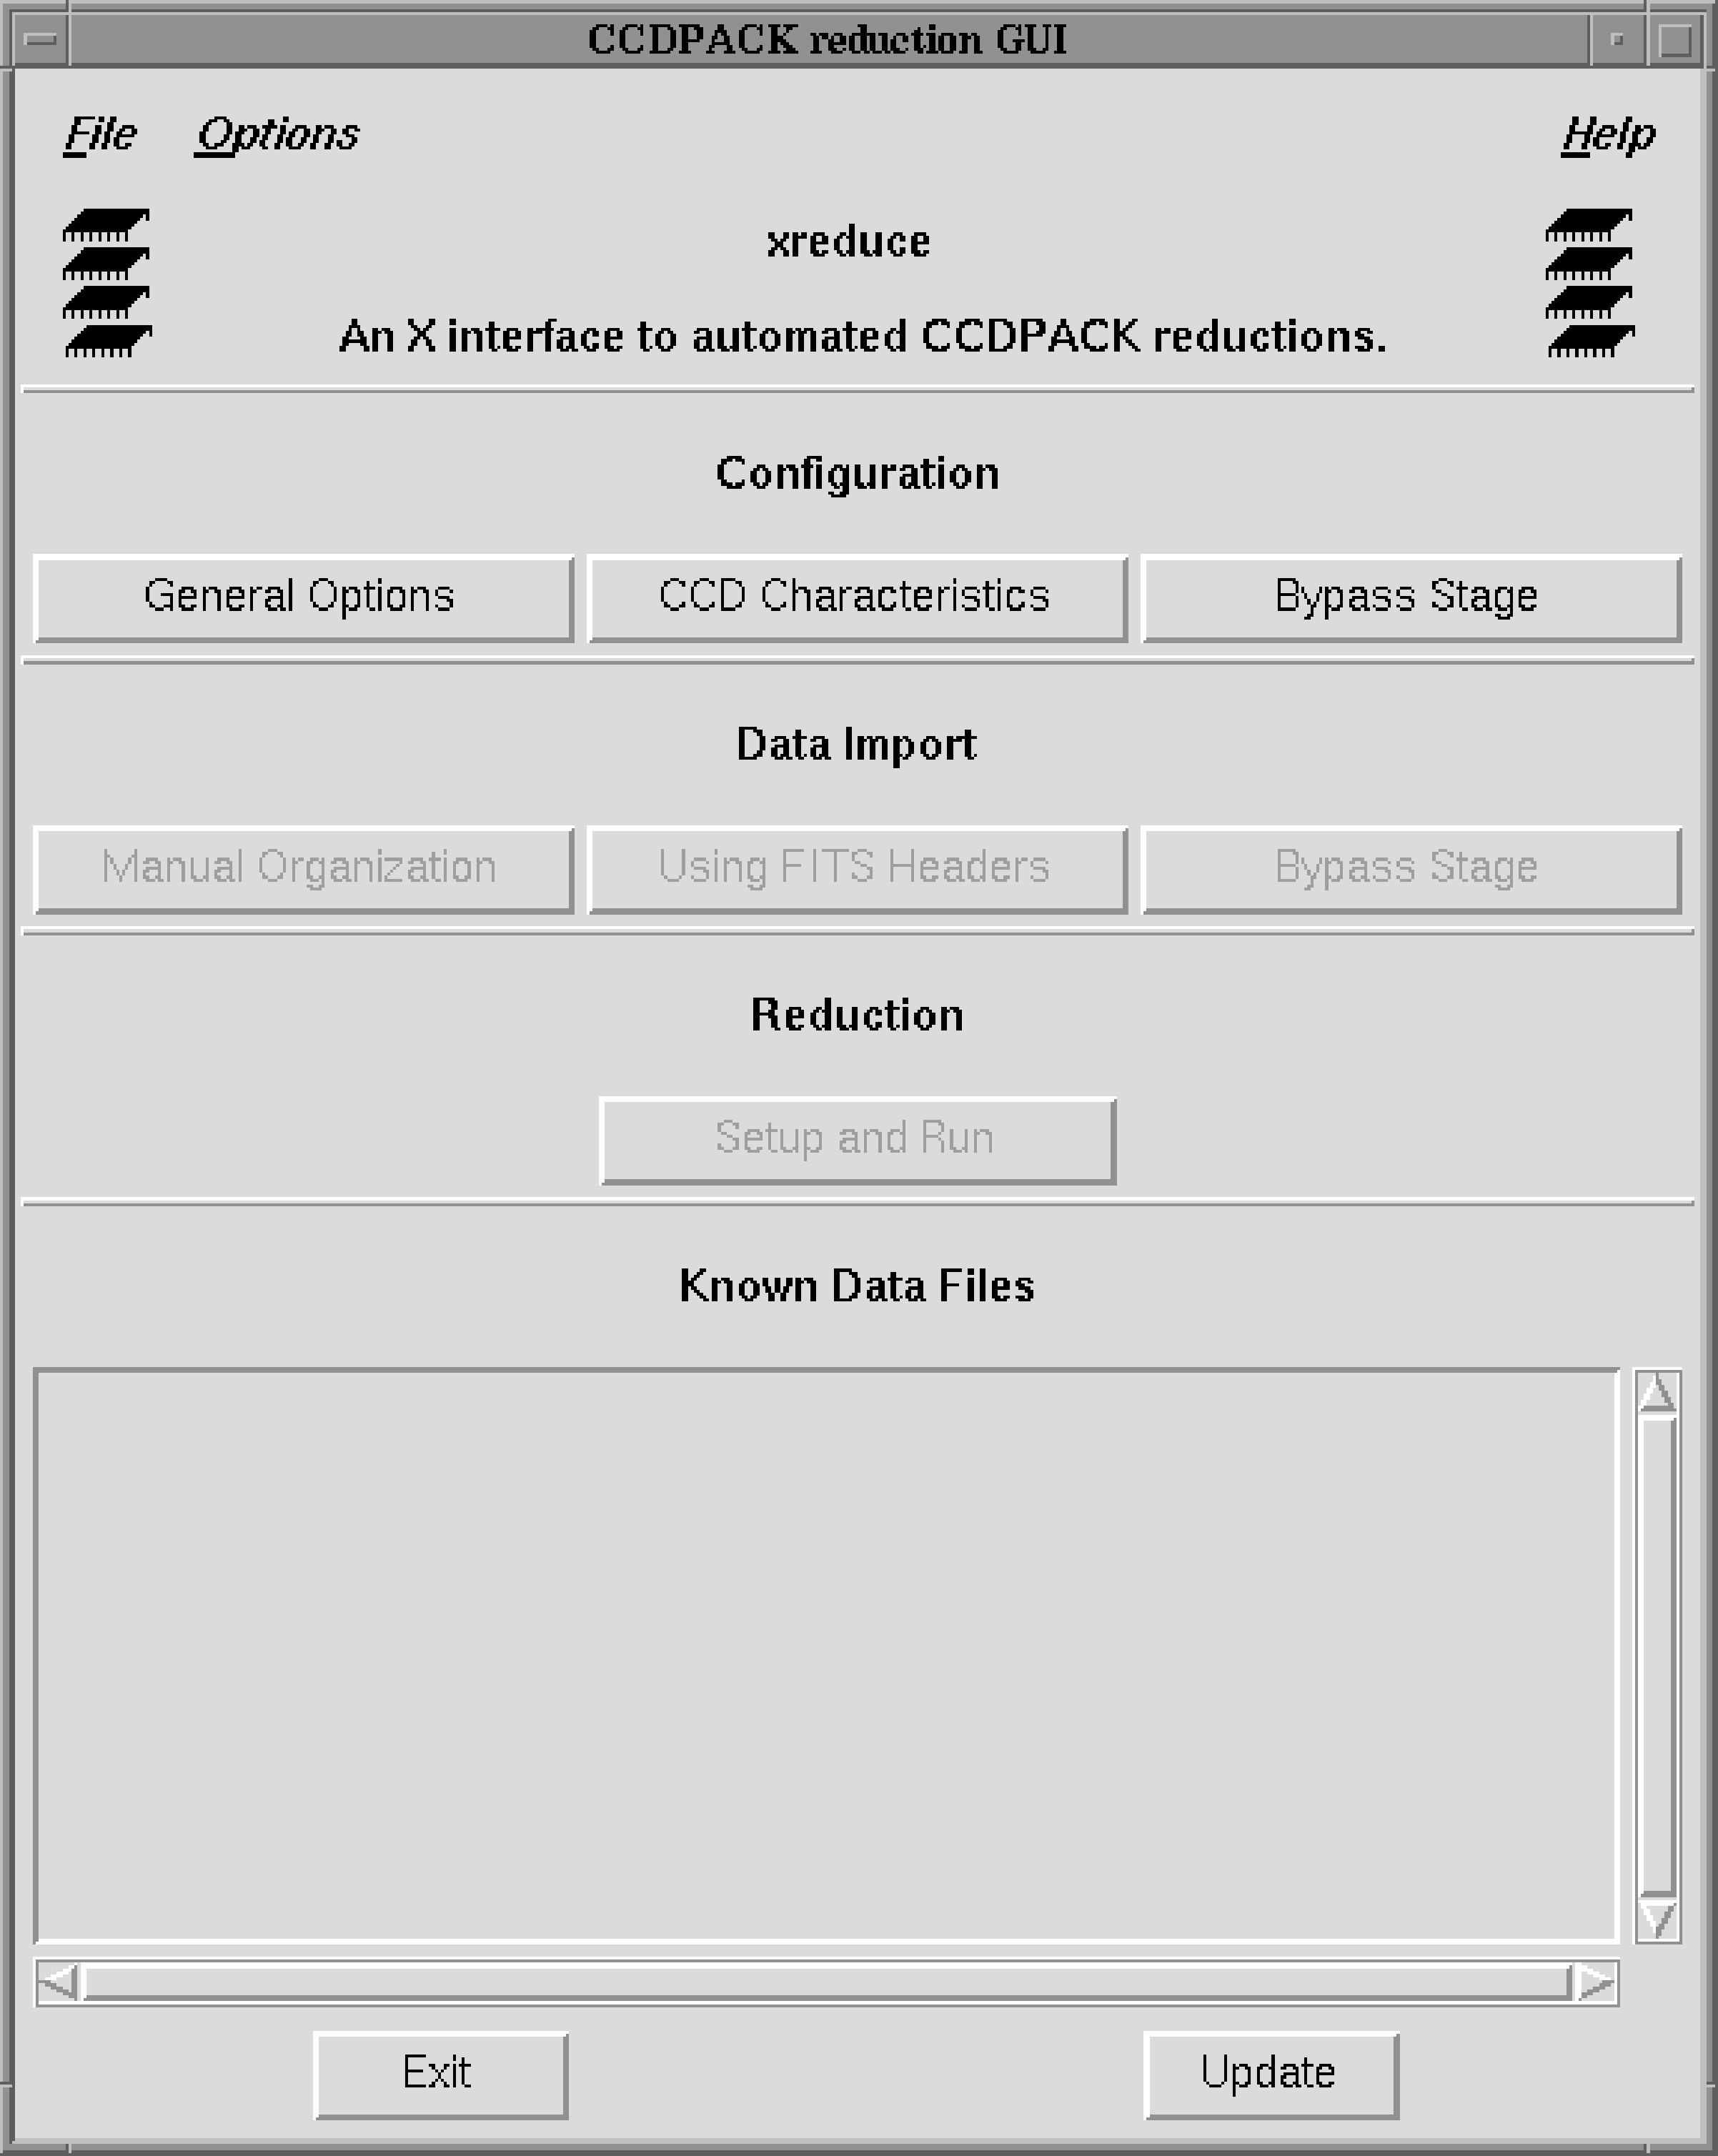
The main xreduce window should appear, as shown in Figure 12. Extensive on-line help
information is available from most of the xreduce windows, to the extent that it is virtually an
‘interactive cookbook’ in itself. Simply click on the Help menu in the top right of the window.
Several options are available: for assistance on using the current window choose the On Window
option. The help information is presented as hypertext displayed with a Web browser (Netscape
by default).
The underlying purpose of xreduce is to gather sufficient details of your data to define how they
are to be reduced. Basically it needs to know: which of the CCDPACK options you plan to use, a
few details about your CCD frames (such as the extents of any bias strips) and the names and
directory specifications of each of your various types of data frames (bias frames, flat
fields, target frames etc). In order to make specifying the details of the CCD frames
easier xreduce has a list of commonly-used chips which you can choose from. If the
instrument that you used is not included in this list then you can enter the requisite details
manually.
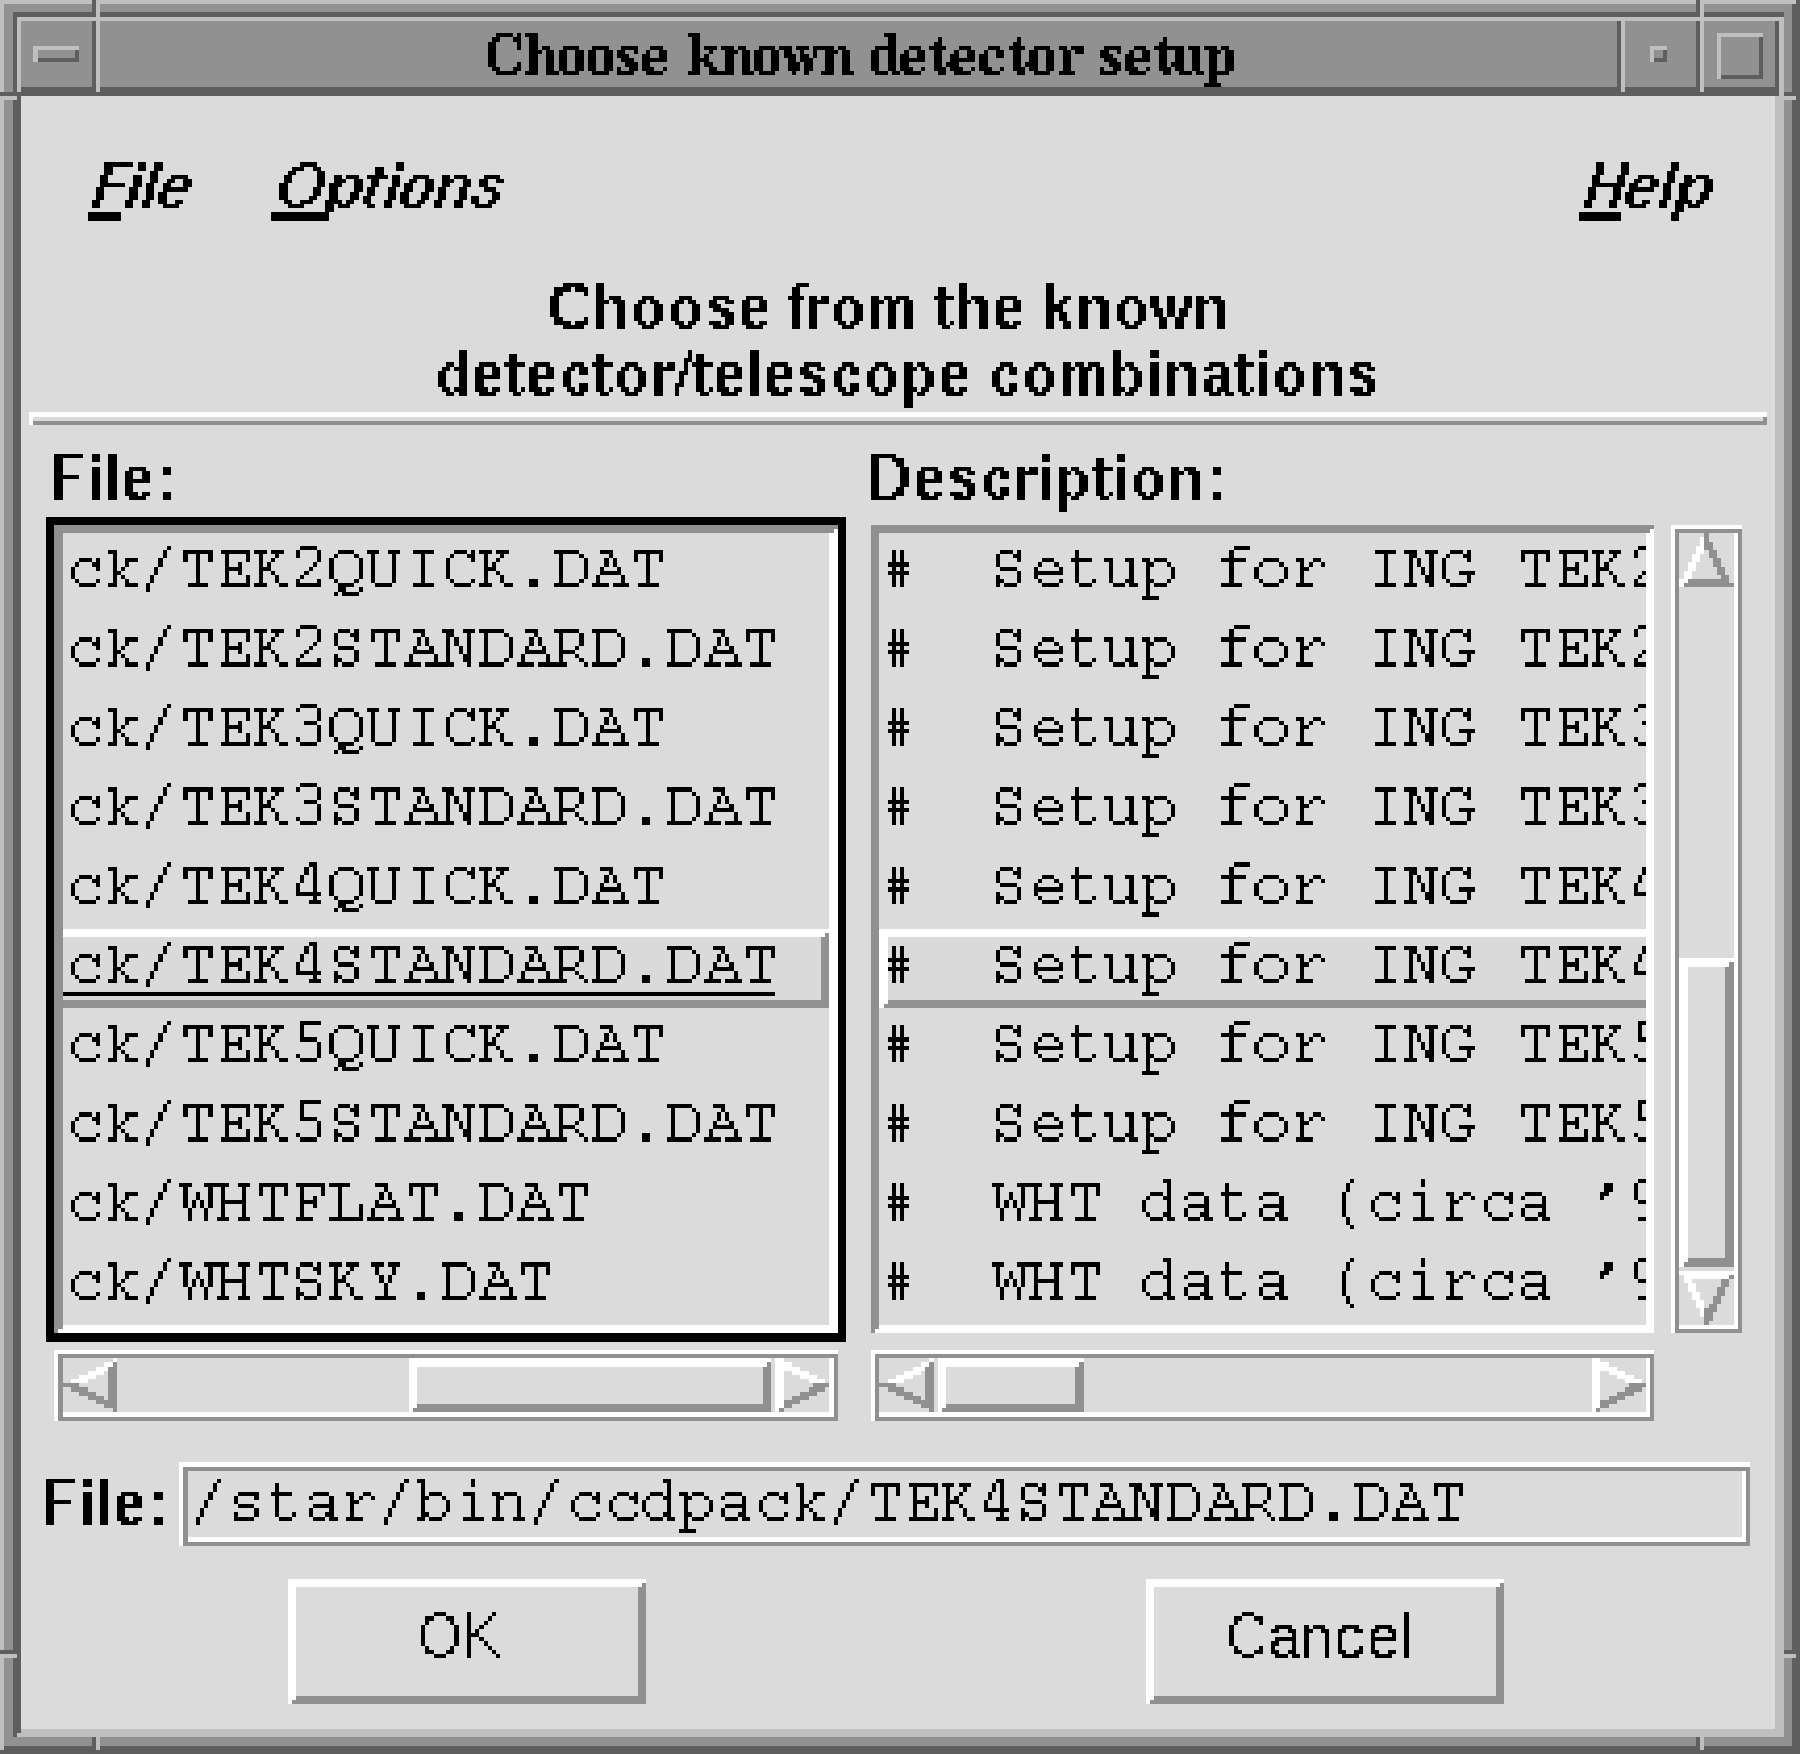
xreduce. Click on the entry
TEK4STANDARD.DAT (as shown) which was the detector used to acquire the example
data.
Figure 13 shows the window as it is created by default. A useful trick is to expand it
horizontally so that the file names and descriptions are more easily visible. Some of the CCD
descriptions end in ‘(setup)’ and others in ‘(table)’. xreduce knows more about the
former than the latter. The option chosen here ends in ‘(setup)’, so full details are
available.
Once you have selected the detector click on the OK button.
Now click on the CCD Characteristics button in the main window. Again the defaults are acceptable, so click on OK.
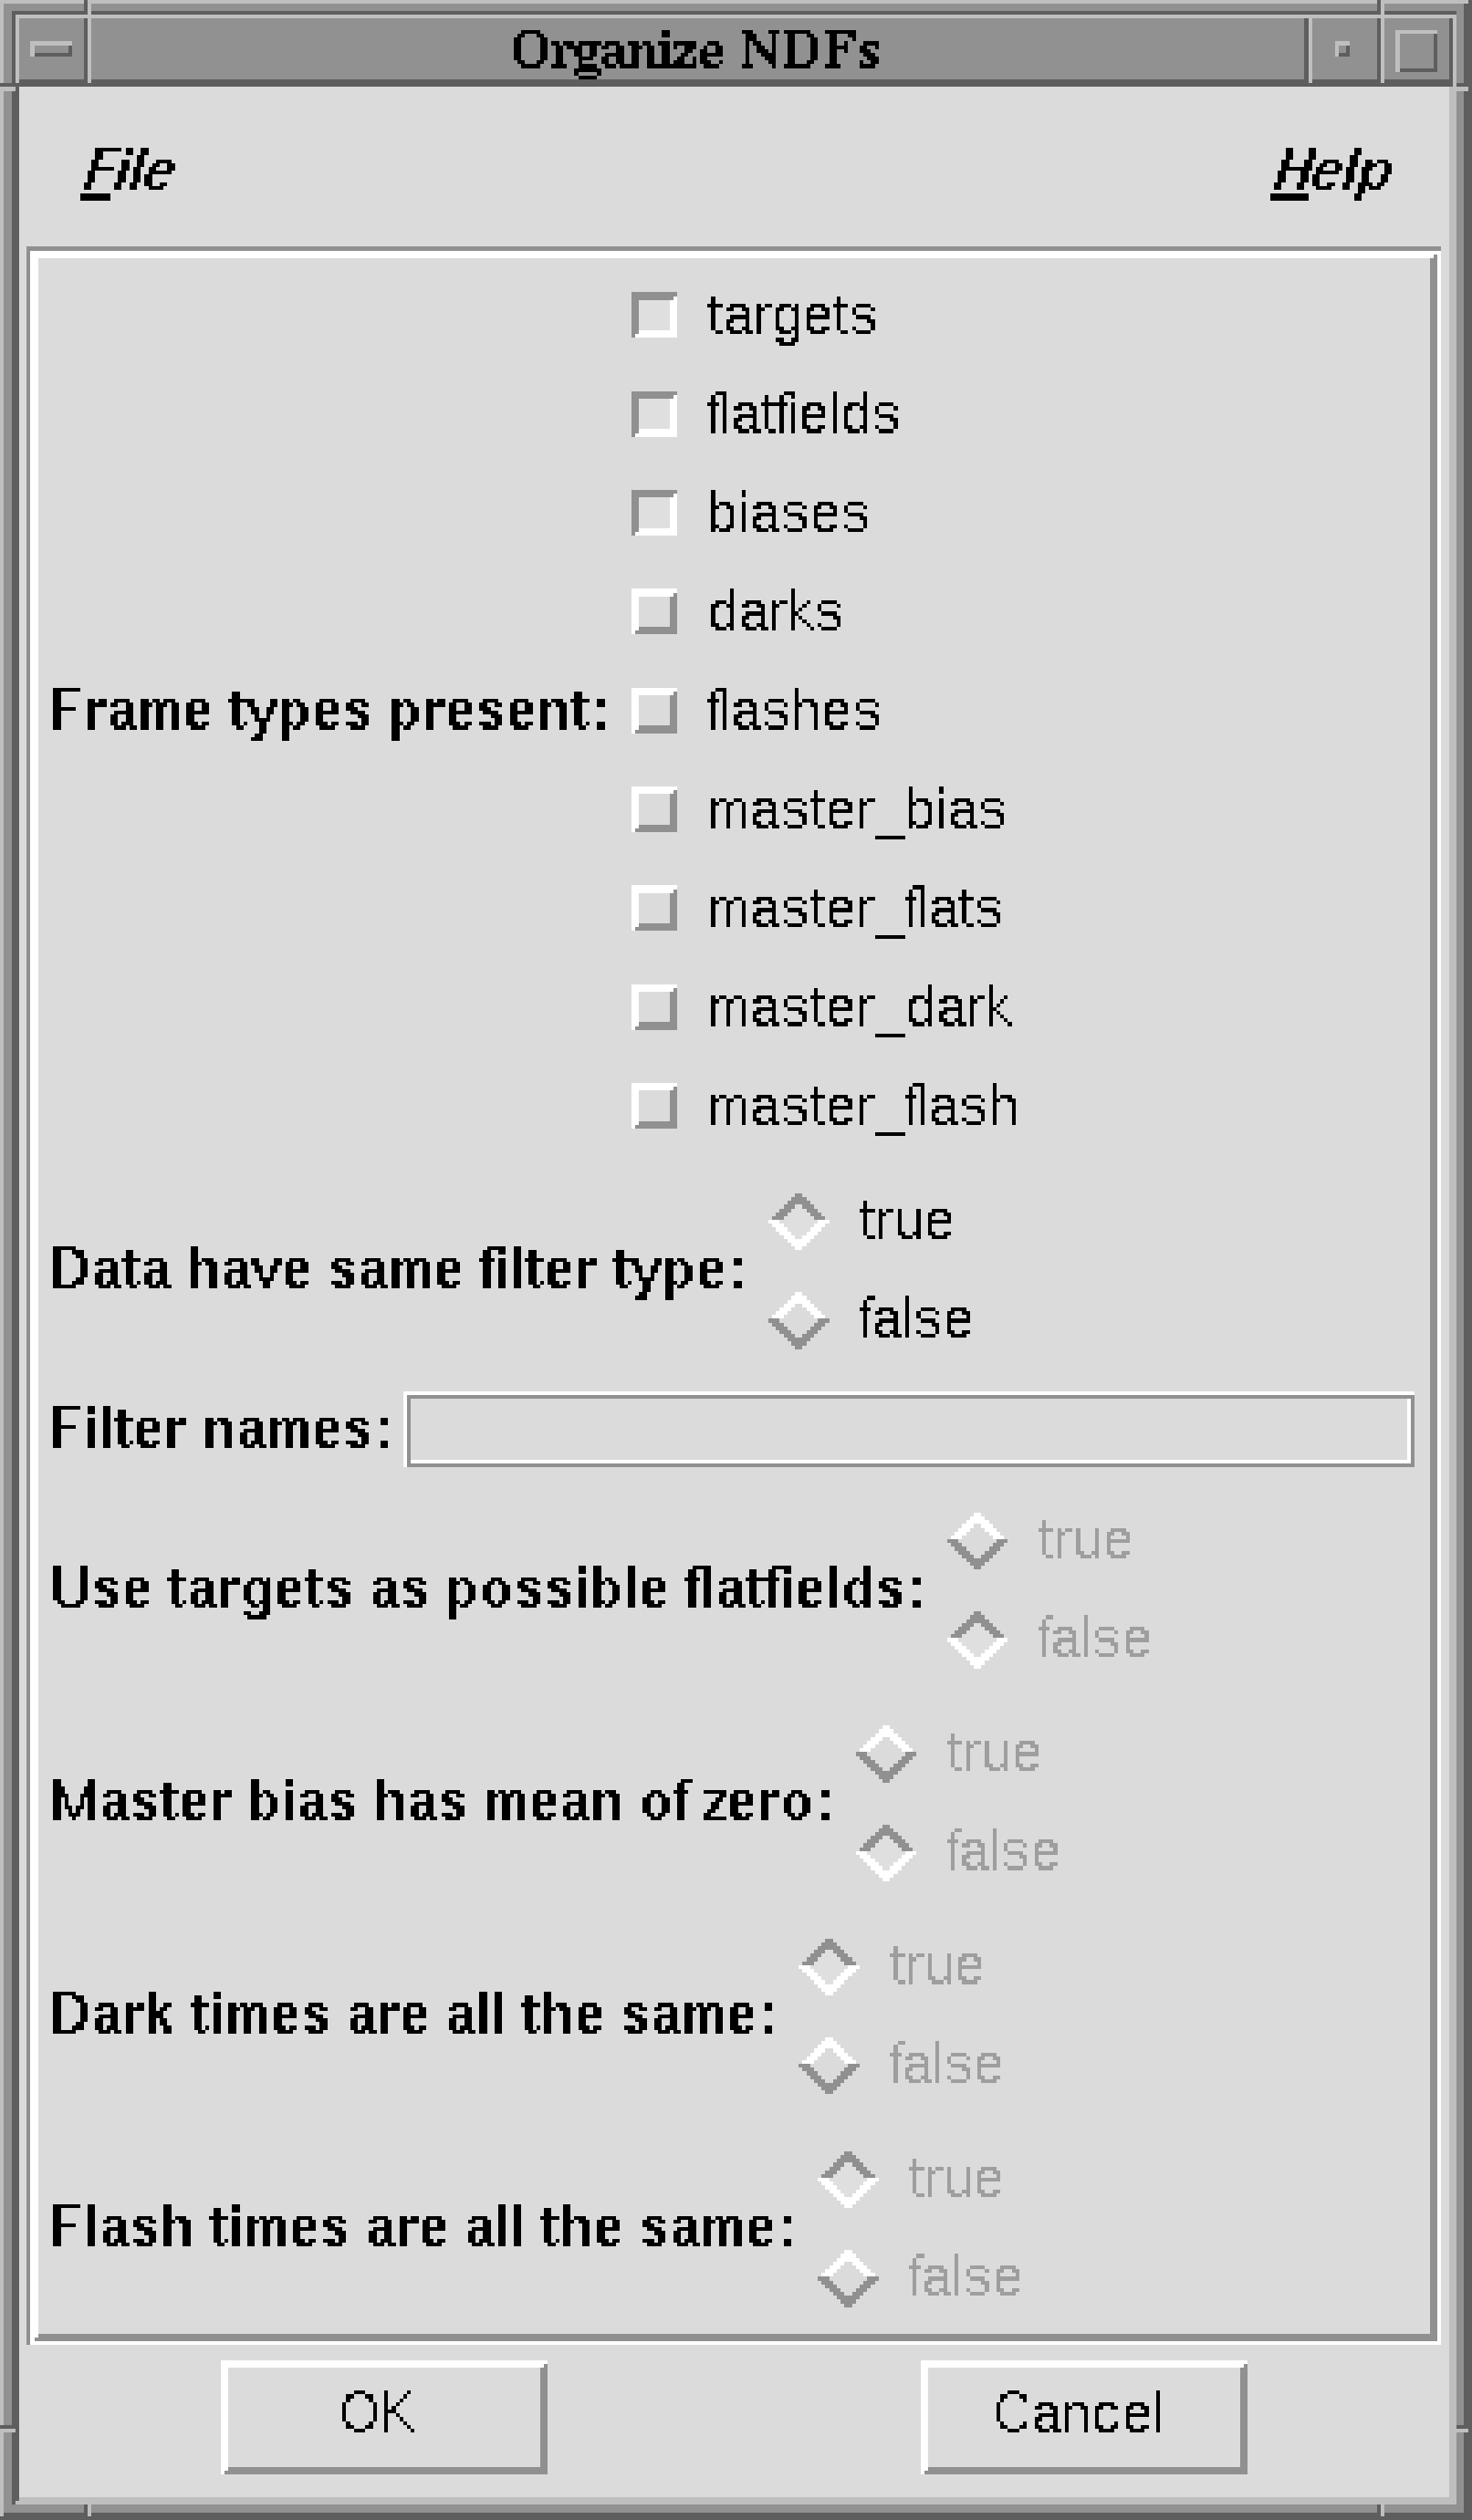
Click on the Manual Organization button and a window similar to Figure 14 should appear. The example data comprise only bias frames, flat fields and images of target objects, so click the three corresponding buttons in the list of Frame types present: in the top half of the window. Ensure that these three are the only data types for which the buttons are set.
The defaults can be accepted for the other options in the lower half of the window. Simply click the OK button.
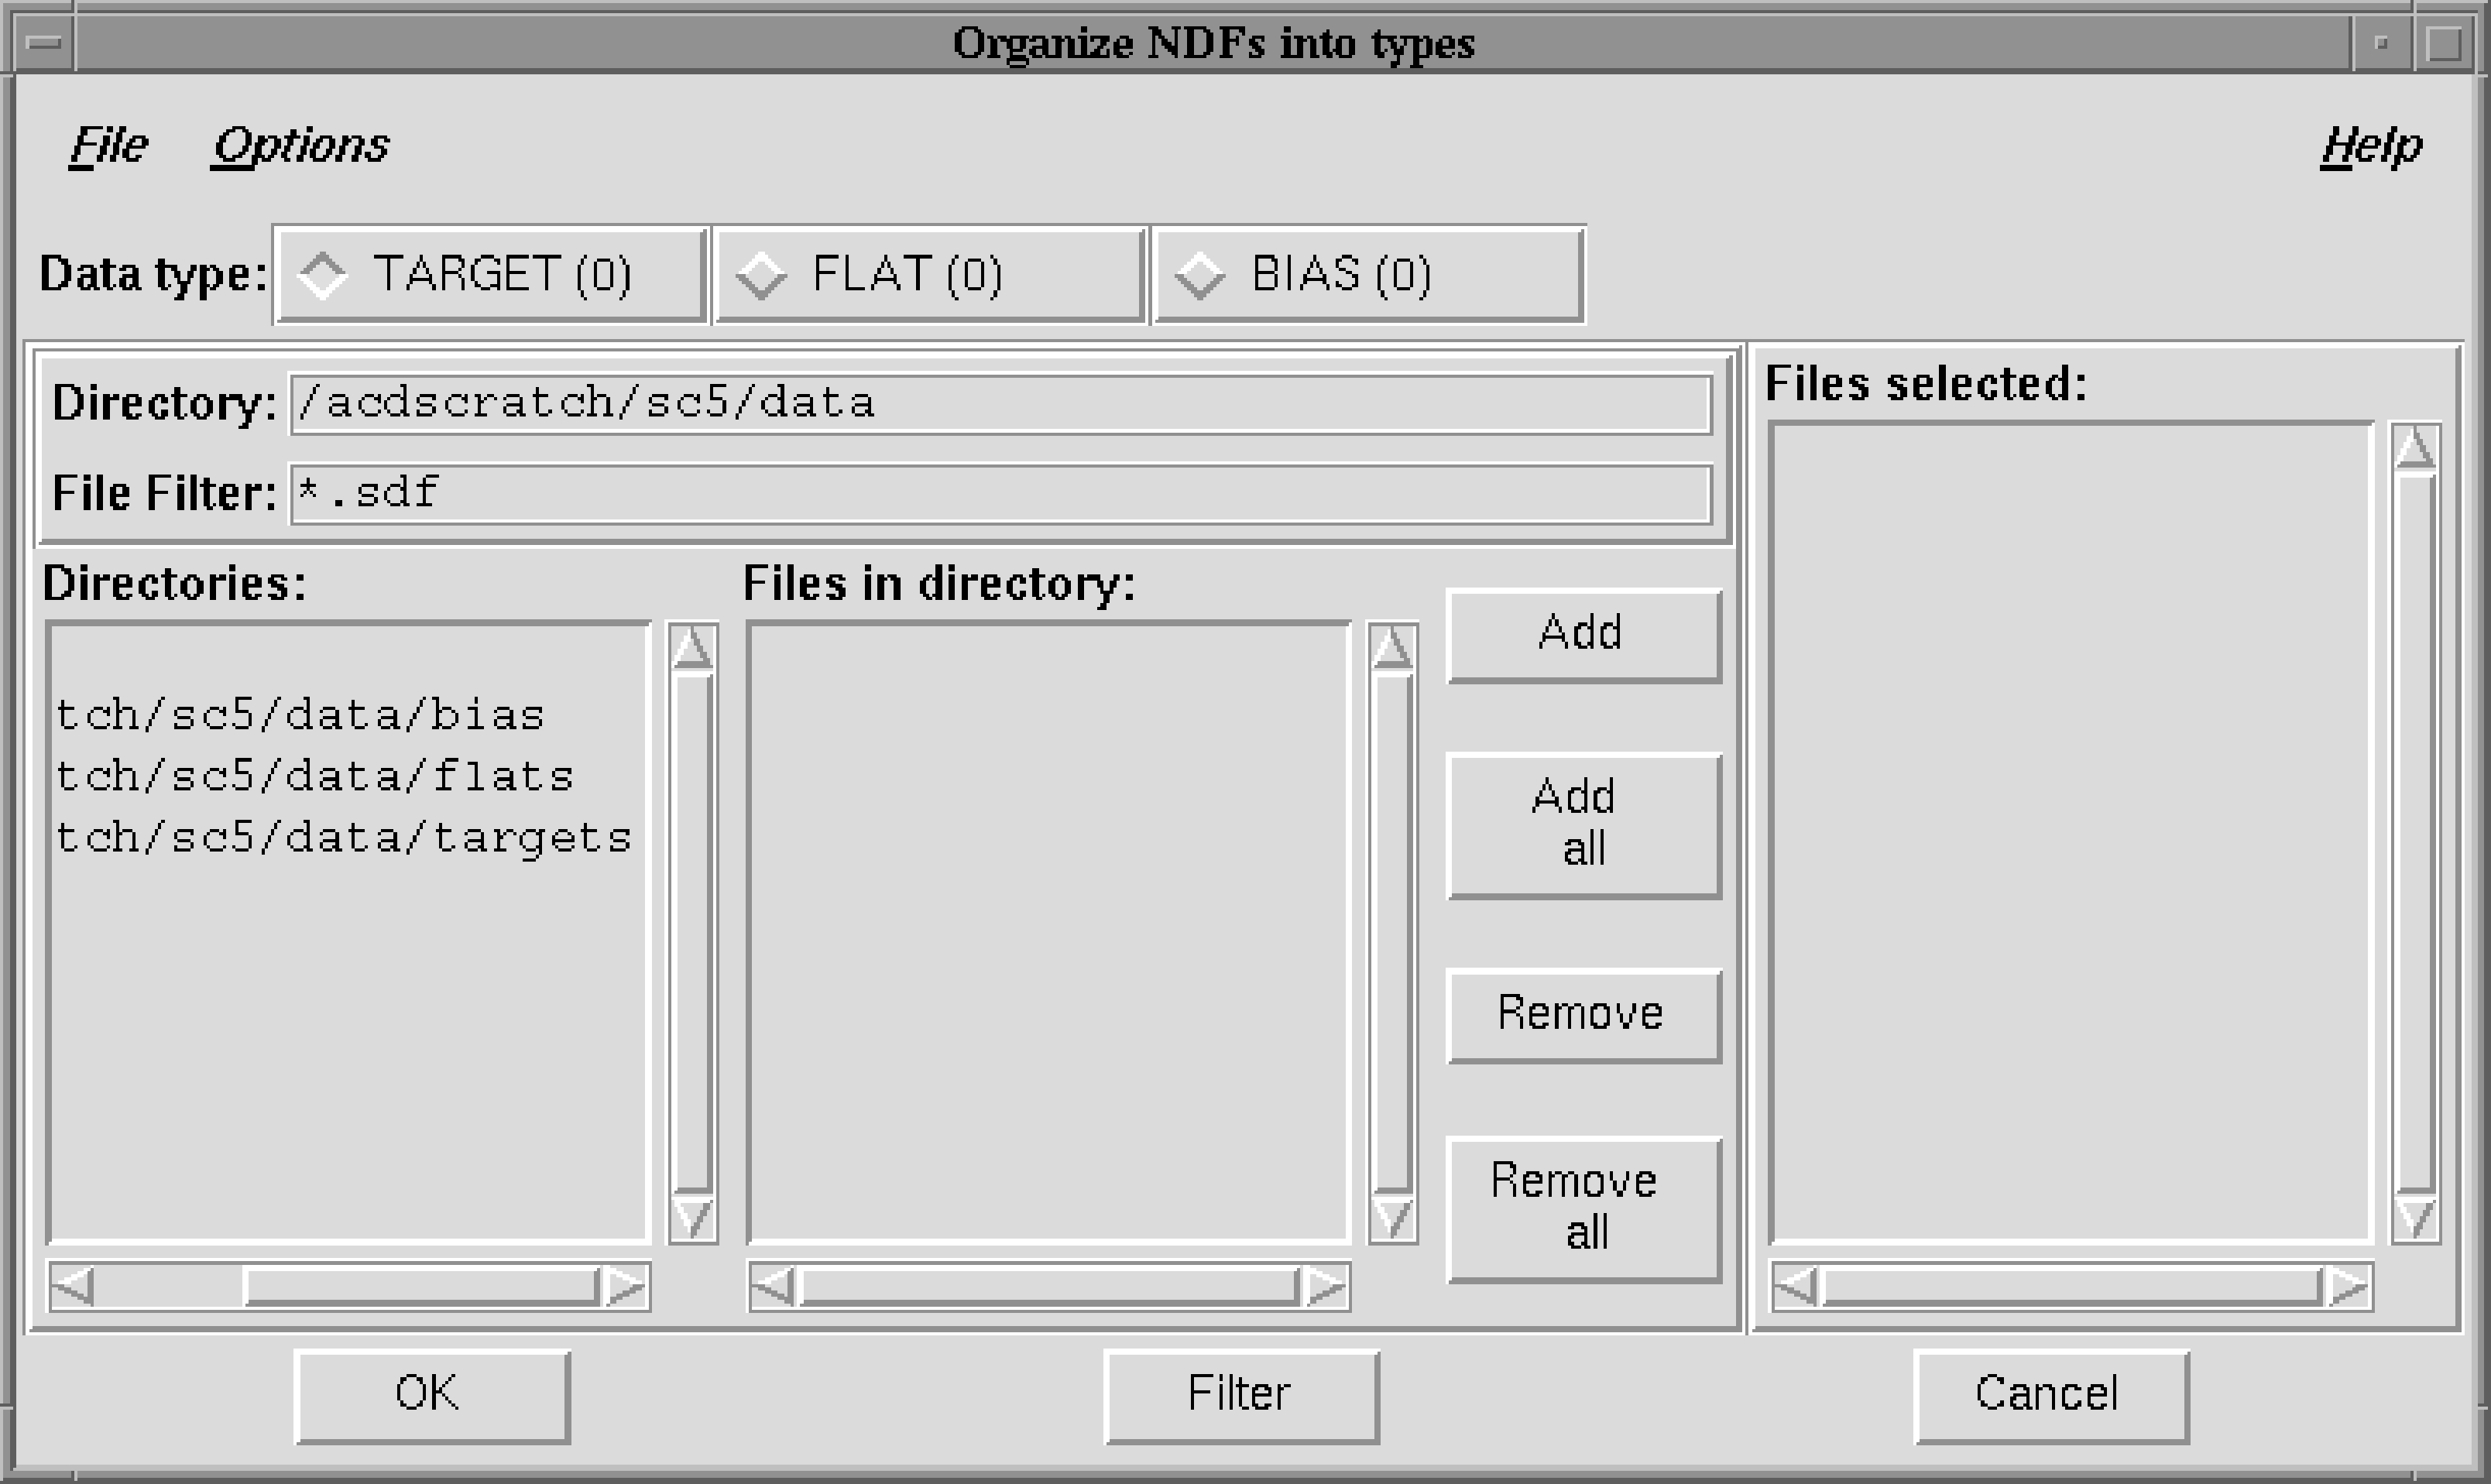
- (a)
- Click the TARGET button in the row towards the top left of the window.
- (b)
- In the Directories: box (on the left side of the window) double-click on the
targetssubdirectory. This directory should become the current directory and the two target frames should appear in the Files in directory: box. - (c)
- Click on the Add all button and the files should appear in the Files selected: box (on the right side of the window).
Repeat the procedure for the flat field and bias frames by clicking on the FLAT and BIAS buttons
(in the row towards the top left of the window) respectively and proceeding as before. The flat
fields are in subdirectory flats and the bias frames in bias.
Once you have specified the files for the three types of frame click the OK button. A window should appear briefly showing the message:
Setting data descriptions, please wait
and you will be returned to the xreduce main window.
checking possible debiassing methods please wait
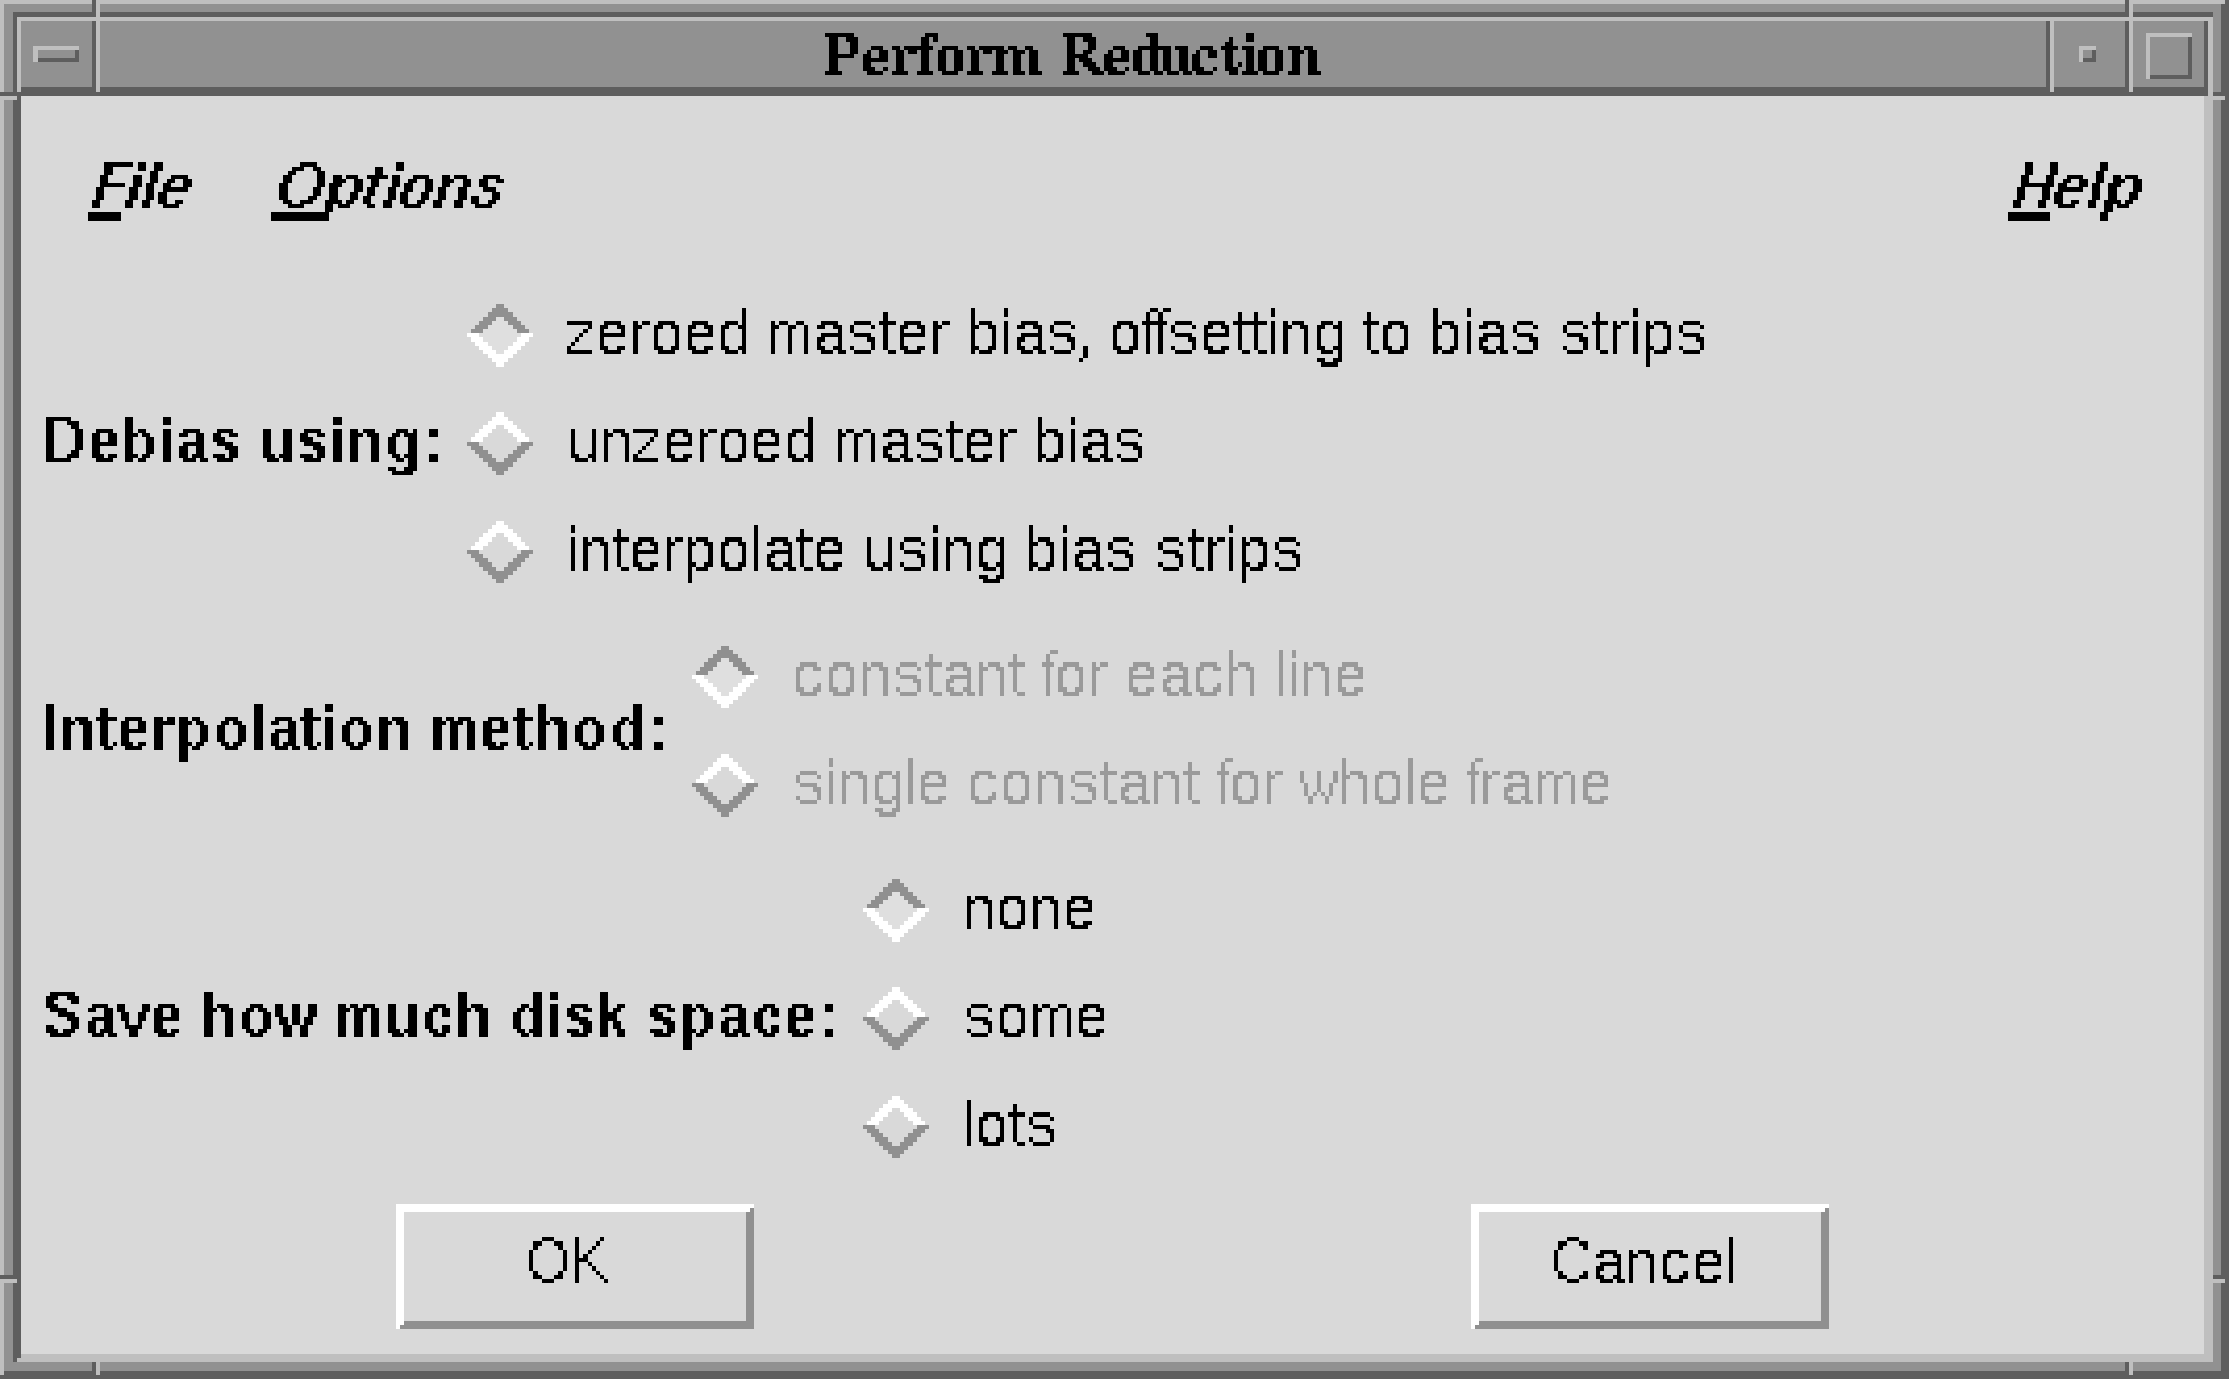
and then be replaced by a window similar to Figure 16. For the example data all the defaults can be accepted, so just click the OK button.
performing reduction scheduling please wait
should appear briefly and be replaced by one saying:
Reduction started. The output will be logged in file "xreduce.log".
Click on the OK button.
xreduce: again you will be asked for
confirmation.
CCDPACK.LOG | CCDPACK log file |
MASTER_BIAS.sdf | master bias frame |
MASTER_FLATNONE.sdf | master flat field frame |
xreduce.csh | xreduce reduction script |
xreduce.log | xreduce log file |
Some files have also been created in the targets subdirectory:
are the de-biassed target images and:
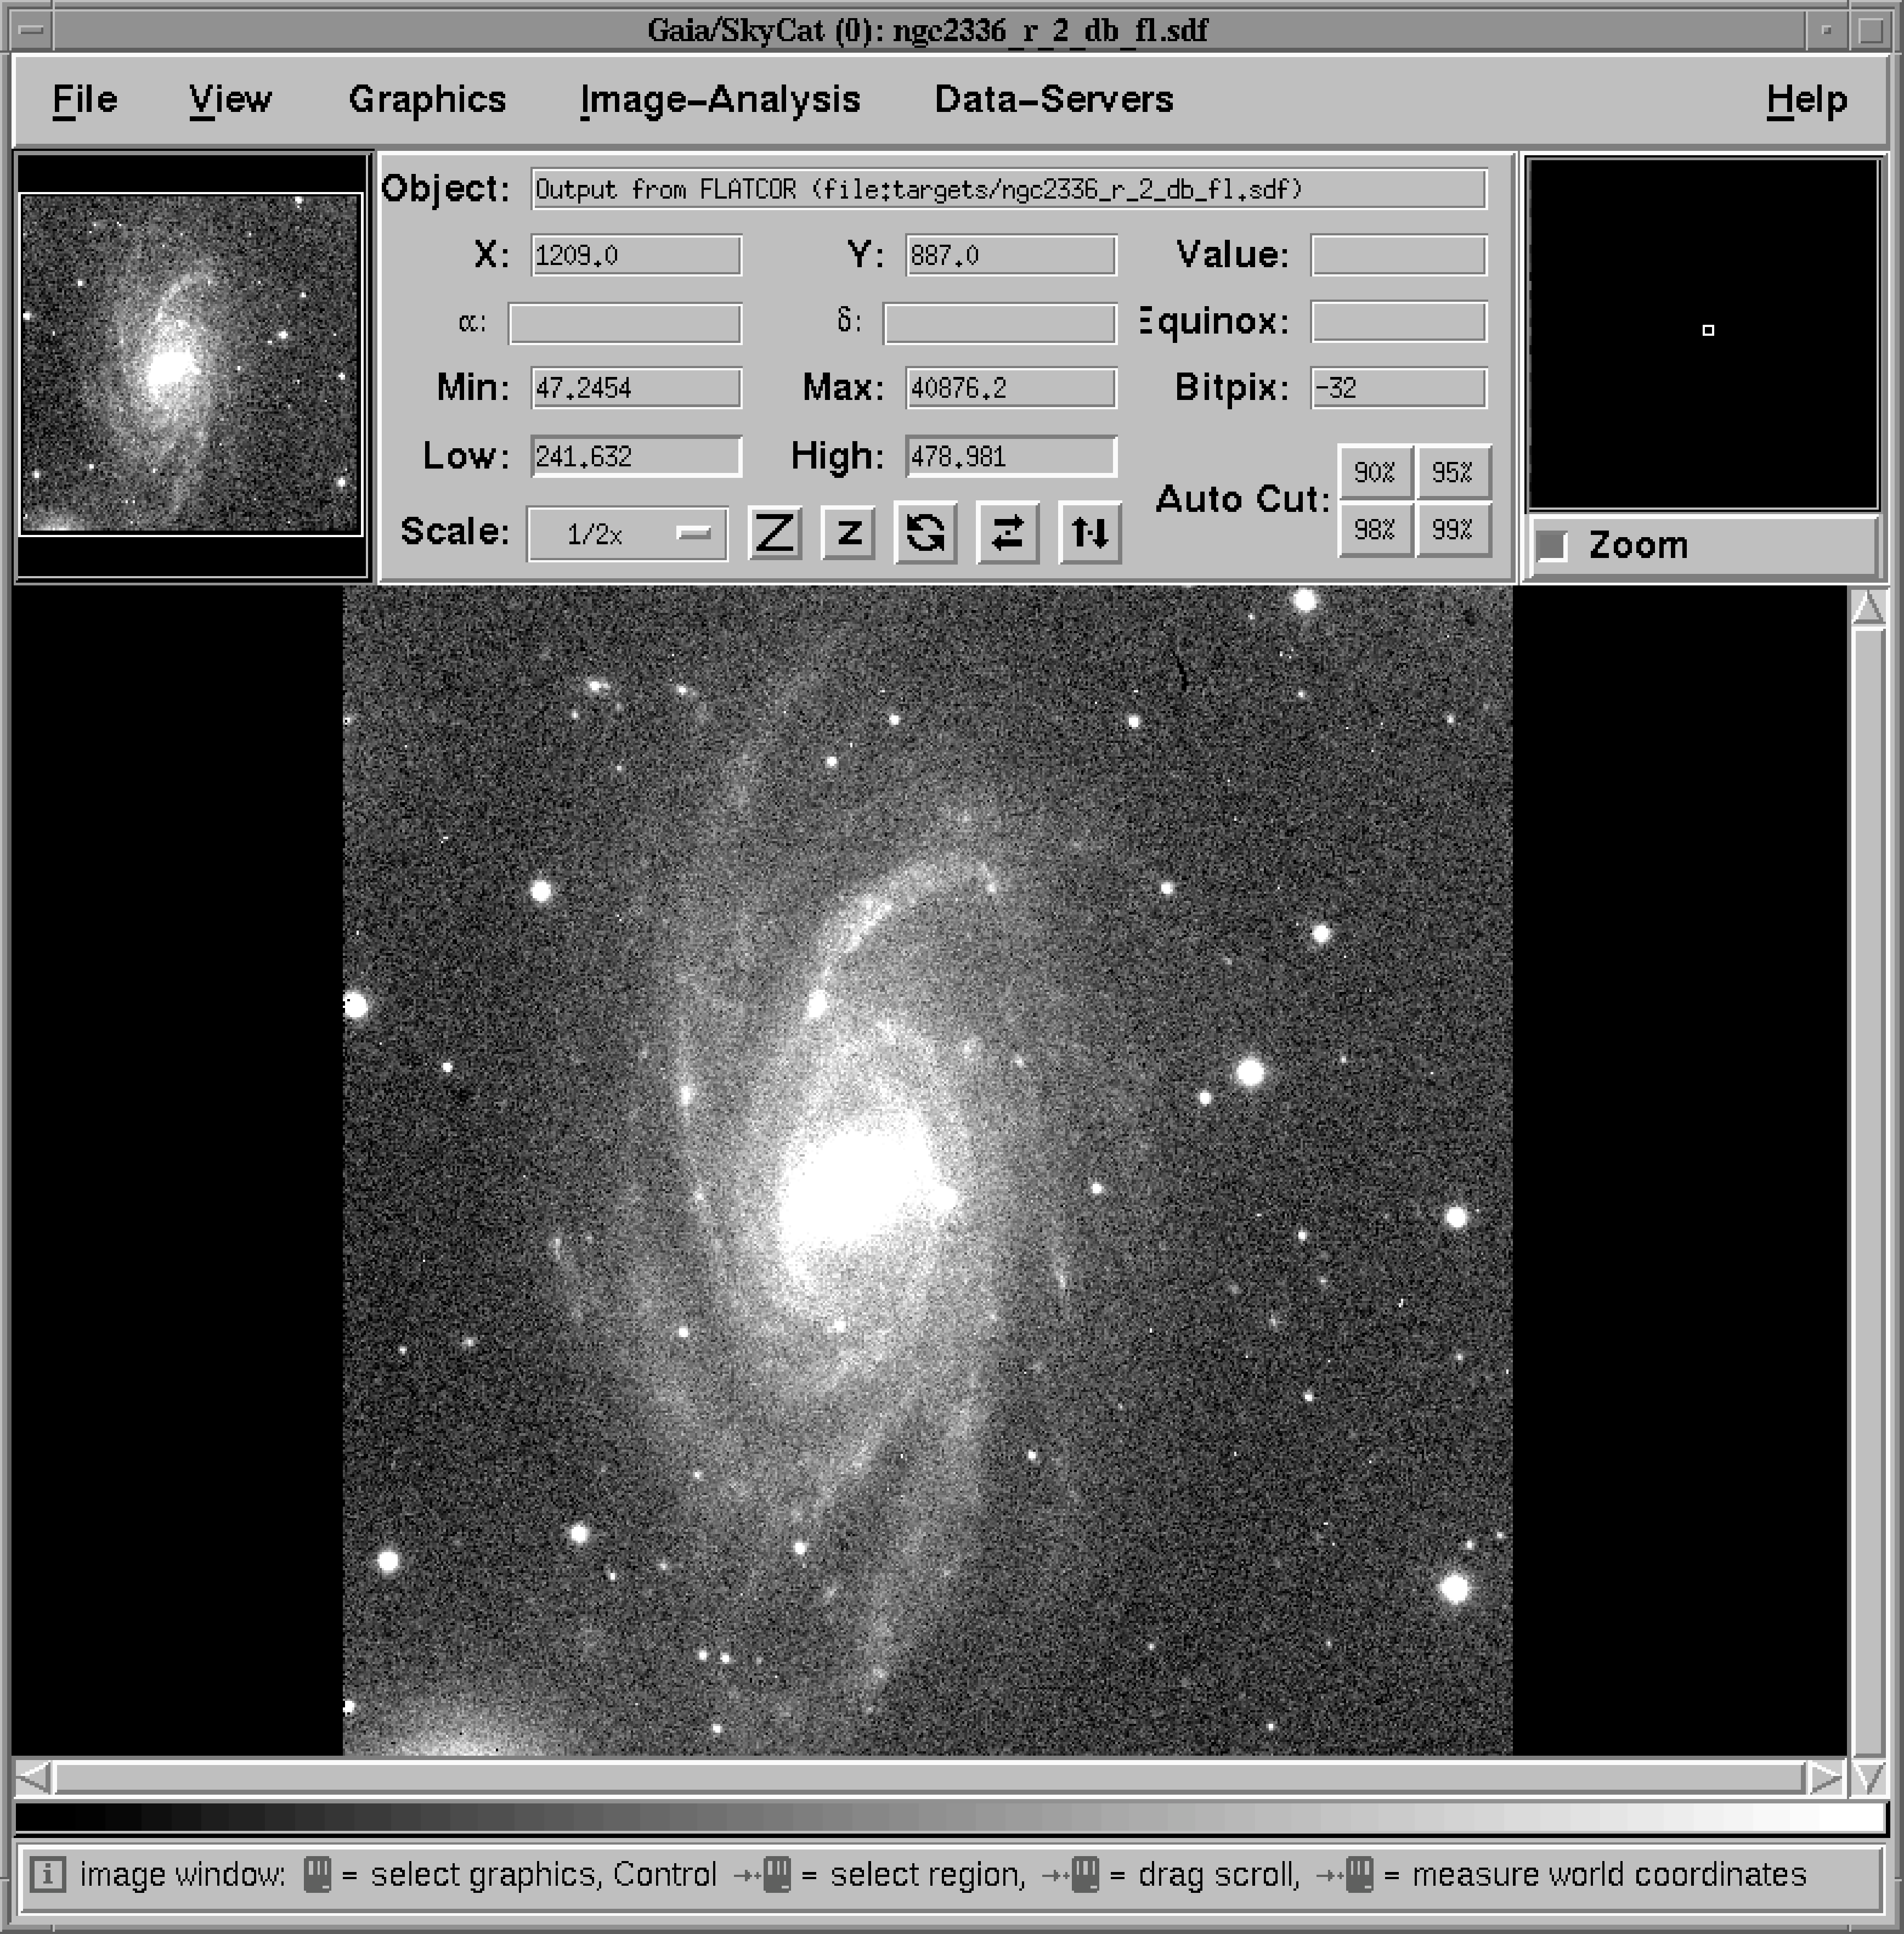
are the de-biassed, flat fielded images: the final product of the data reduction. They can be examined, for example, with GAIA. Type:
After setting the Auto Cut level, Magnification and colour table (see the recipe in Section 10) the image should look something like Figure 17.
Note that script xreduce.csh is not deleted because it is interesting to compare it with the
commands issued in the following recipe.
