display in KAPPA (see SUN/95[11]) is ideal11.
It is best to create the display window using the xmake utility because in this way you
can define the display to have an overlay plane, thus allowing the graphics output by
PHOTOM to be cleared without destroying the displayed image. So, start the display
with a command like:
display using xwindows as the display device. Briefly,
type:
to load the KAPPA package. Then issue the following commands:
DEVICE - Name of display device > xwindows
% display
IN - NDF to be displayed > ccdframe
DEVICE - Name of display device > xwindows
MODE - Method to define the scaling limits /’SCALE’/ > FAINT
Data will be scaled from 200 to 2666.
lutneg sets up a negative grey-scale colour
table12.
display displays the image, which should appear as a grey-scale plot. Note that the input file
name is (and must be) specified without the ‘.sdf’ file type.
photomstart to enable its commands and photom to start.
You will be asked for the name of a data frame. Again the file name must be specified
without the file type. The default name for the output file written by PHOTOM is
photom.dat. If this file exists, an error message will appear and you will be prompted for an
alternate name. The sequence of commands and responses should be something like the
following:
Semim = 5.0
Eccen = 0.00
Angle = 0.0
Centroiding of star in aperture
Concentric sky aperture
Inner radius = 1.3
Outer radius = 2.1 times object aperture radius
Sky estimator = Mode
Sky magnitude = 50.0
Photons per ADU = 1.00
Exposure time = 1.00
Saturation level ( data units ) = 0.17000E+39
Errors from sky variance
COMMAND - PHOTOM /’Values’/ >
You can use Help to find out what the options are:
Commands are - Annulus, Centroid, End, File, Help, Ishape, Measure,
Nshape, Options, Photons, Sky, Values
Annulus - Toggle between sky measured in concentric annulus or in selected area
Centroid - Toggle between measuring around centroid of image or given position
End - Exit program
File - Supply a file of object positions
Help - This help message
Ishape - Select aperture shape interactively
Measure - Make measurements interactively
Nshape - Select aperture shape non-interactively
Options - Change values of some parameters
Photons - Select error estimate - photon statistics, sky or data variance
Sky - Select sky estimator - mean, mean within 2 sigma, mode or user given
Values - Output current parameter values
COMMAND - PHOTOM /’Values’/ >
Some of these choices toggle between values. The way these options work is that when the appropriate command is issued the chosen option is switched from whatever its current state happens to be to its other state. A message is issued indicating the new state. Centroiding, for instance, can be switched on or off. Generally for interactive work it is best to leave centroiding switched on.
Annulus command until a concentric
aperture is selected.
Now you will need to choose some suitable values for the measuring aperture radii. The background annulus measuring region should be set so that its inner radius is a little outside the central circle, so that it is not unduly contaminated with stray light and its outer radius should not be so big that it includes too many surrounding objects.
How big does the radius of the measuring aperture need to be, and how much bigger should the background annulus around it be? There is no hard and fast answer: it depends on the plate scale of the image, how crowded the field is and whether the programme objects are stars or extended objects. If the aperture is too small then a fraction of the light from the object being measured will fall outside the aperture and not be detected, thus leading to an underestimate of the brightness of the object.
If your programme objects are stars and all your CCD frames have the same point-spread function (that is, the seeing remained the same whilst all the frames were acquired) then the choice of aperture is not too critical. All the objects measured, both programme stars and standard stars, have the same profile and hence they all lose the same fraction of their light. This systematic underestimation of the brightness is simply calibrated out when the instrumental magnitudes are converted to magnitudes in a standard system. In this case quite a small aperture can be used in order to minimise statistical errors in the background and contamination by faint stars.
The situation is rather different if the programme objects are extended objects. Here the programme objects will have a different intensity profile to the standard stars and hence for a given aperture size a different fraction of the total light will be lost. Thus it is important to determine the total magnitudes for both standard stars and programme objects and a larger aperture is appropriate.
An aperture radius of about twenty seconds of arc is often a reasonable starting point.
The background can be sampled using various algorithms. A simple mean will obviously be sensitive to any contaminating source, such as faint stars, within the annulus, but a mode will tend to be less affected by aberrant, outlying values.
SEMIM - Semi-major axis /5/ > 8
ECCEN - Eccentricity /0/ >
ANGLE - Orientation /0/ >
COMMAND - PHOTOM /’Values’/ >
Notice a couple of things here:
- you only need to use the initial letter of your choice,
- an arbitrary elliptical aperture can be chosen. This option is suitable for measuring elliptical galaxies13.
Now set the other required values:
INNER - Inner annular radius /1.4/ > 1.3
OUTER - Outer annular radius /2/ > 2.1
PADU - Photons per ADU /1/ >
SKYMAG - Magnitude of sky /50/ > 30
BIASLE - Bias level ( data units ) /0/ >
SATURE - Saturation level ( data units ) /1.7E38/ >
COMMAND - PHOTOM /’Values’/ >
A few more things to note:
- the annulus measurements are entered as multiples of the measurement aperture,
SKYMAGis essentially the arbitrary constant A which appears in equations 14, 15 and 16. It is usually sensible to set it to an improbable value, such as 30 (as used here) so that the instrumental magnitudes measured by PHOTOM are not inadvertently confused with calibrated magnitudes. Conversely, if the absolute value of the sky background is known and used then the instrumental magnitudes will approximate to calibrated magnitudes, albeit without atmospheric extinction and colour corrections,- other values, such as
PADUandBIASLEwill be specific to the data.
m and
when prompted for the display device use xoverlay. The text boxes that appear
towards the bottom of the display refer to the corresponding mouse buttons. Proceed as
follows.
- (a)
- Position the cursor over the object to be measured and click the left mouse button or enter 1 from the keyboard.
- (b)
- Repeat the procedure for all the objects which you wish to measure.
- (c)
- To finish, click on the right mouse button or enter 0 from the keyboard and you will
return to the PHOTOM ‘
COMMAND’ prompt.
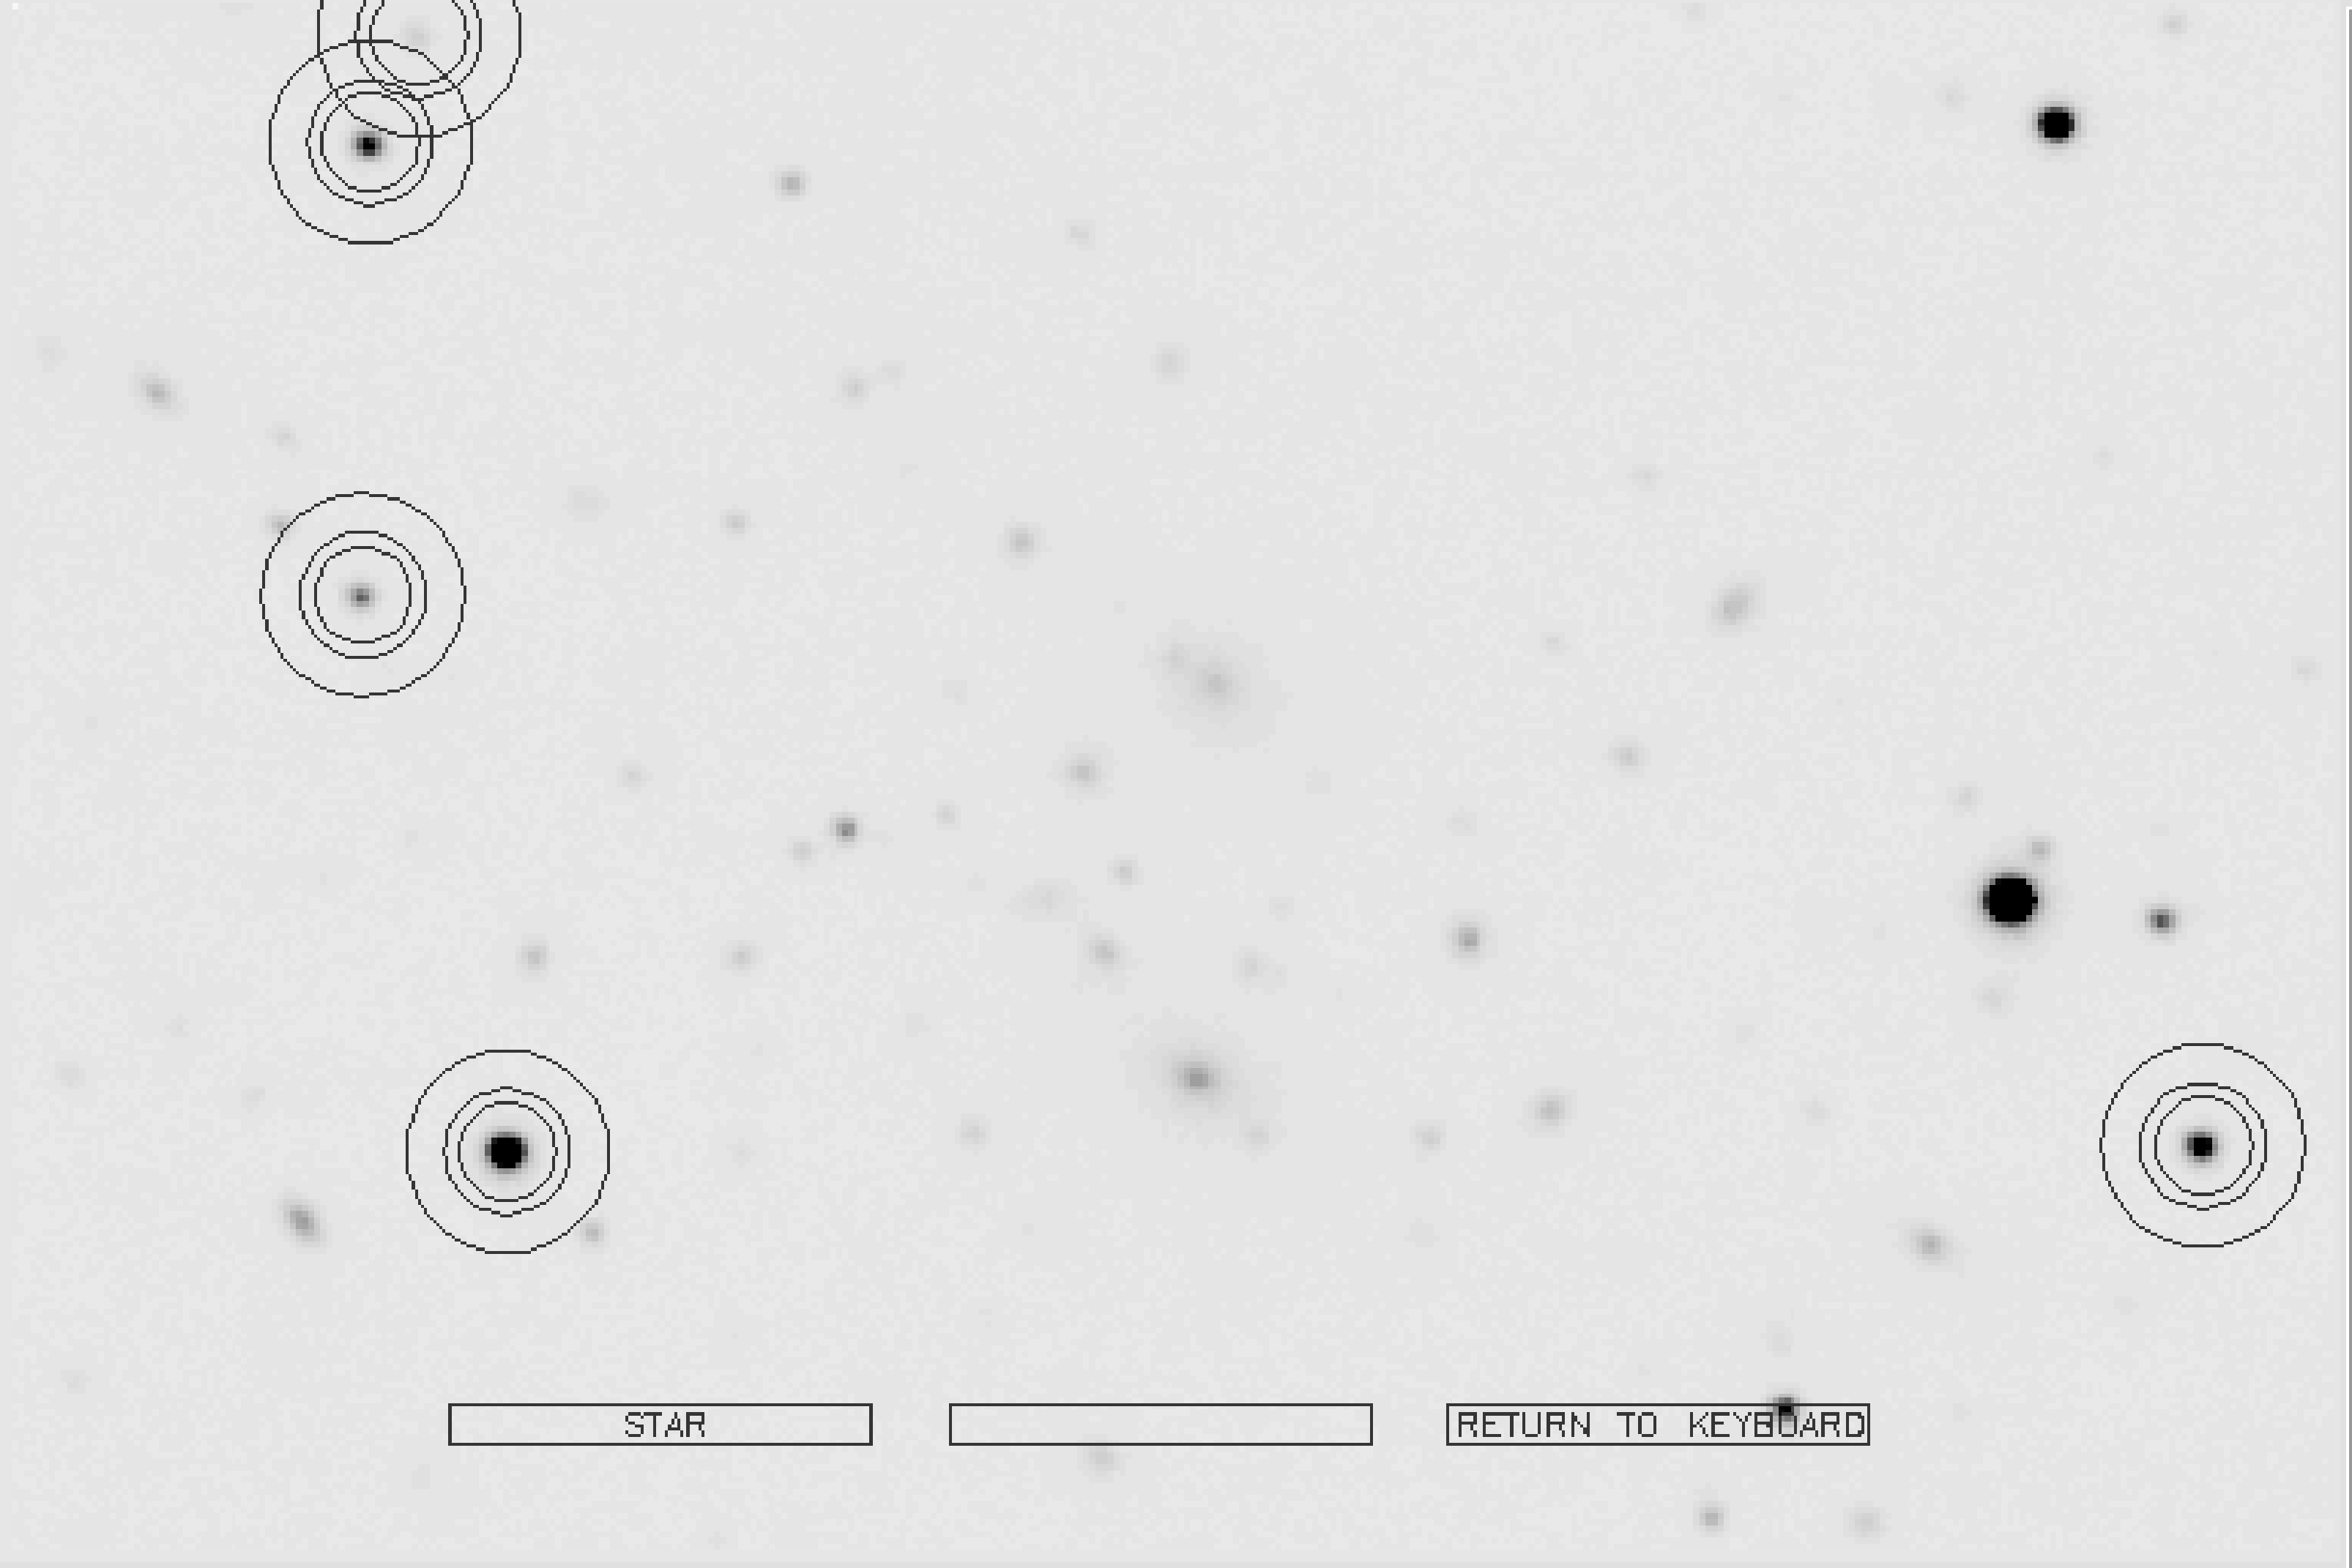
The resulting display will look something like Figure 8. As each star is measured the terminal or workstation will output the results (and echo them to the output file specified when starting PHOTOM):
DEVICE - Display device /@xwindows/ > xoverlay
Select operation according to screen menu
Left hand box - Press left hand mouse button
Centre box - Press centre mouse button
Right hand box - Press right hand mouse button
====================================================================
nx ny a e theta
384 256 8.00 0.000 0.0
x y mag magerr sky signal code
1 57.70 157.74 19.322 0.011 489.965 18675.065
2 58.90 232.74 18.571 0.007 493.119 37287.484
3 66.94 250.43 20.447 0.025 493.768 6622.757 E
4 81.58 65.64 17.059 0.003 489.962 150087.483
5 362.25 66.61 18.209 0.005 491.481 52030.981
COMMAND - PHOTOM /’Values’/ >
If you are working through the recipe the actual values you obtain will probably be slightly different because you will have positioned the apertures differently. The meaning of each of the columns is described in SUN/45. Notice the following:
- measurements of both sky and object are given,
- magnitude values are relative to an artificial sky value of 30,
- object 3 is the star that has been measured at the top of the image. It can be seen that the inner aperture has crossed the edge of the frame. Therefore some proportion of the flux here will have been lost. This problem has been recognized by flagging the result with an ‘E’ in the code column, the ‘E’ standing for ‘edge’.
- (a)
- Type
ato toggle theAnnuluschoice. The message ‘Interactive aperture in use’ should be displayed. - (b)
- Type
m - (c)
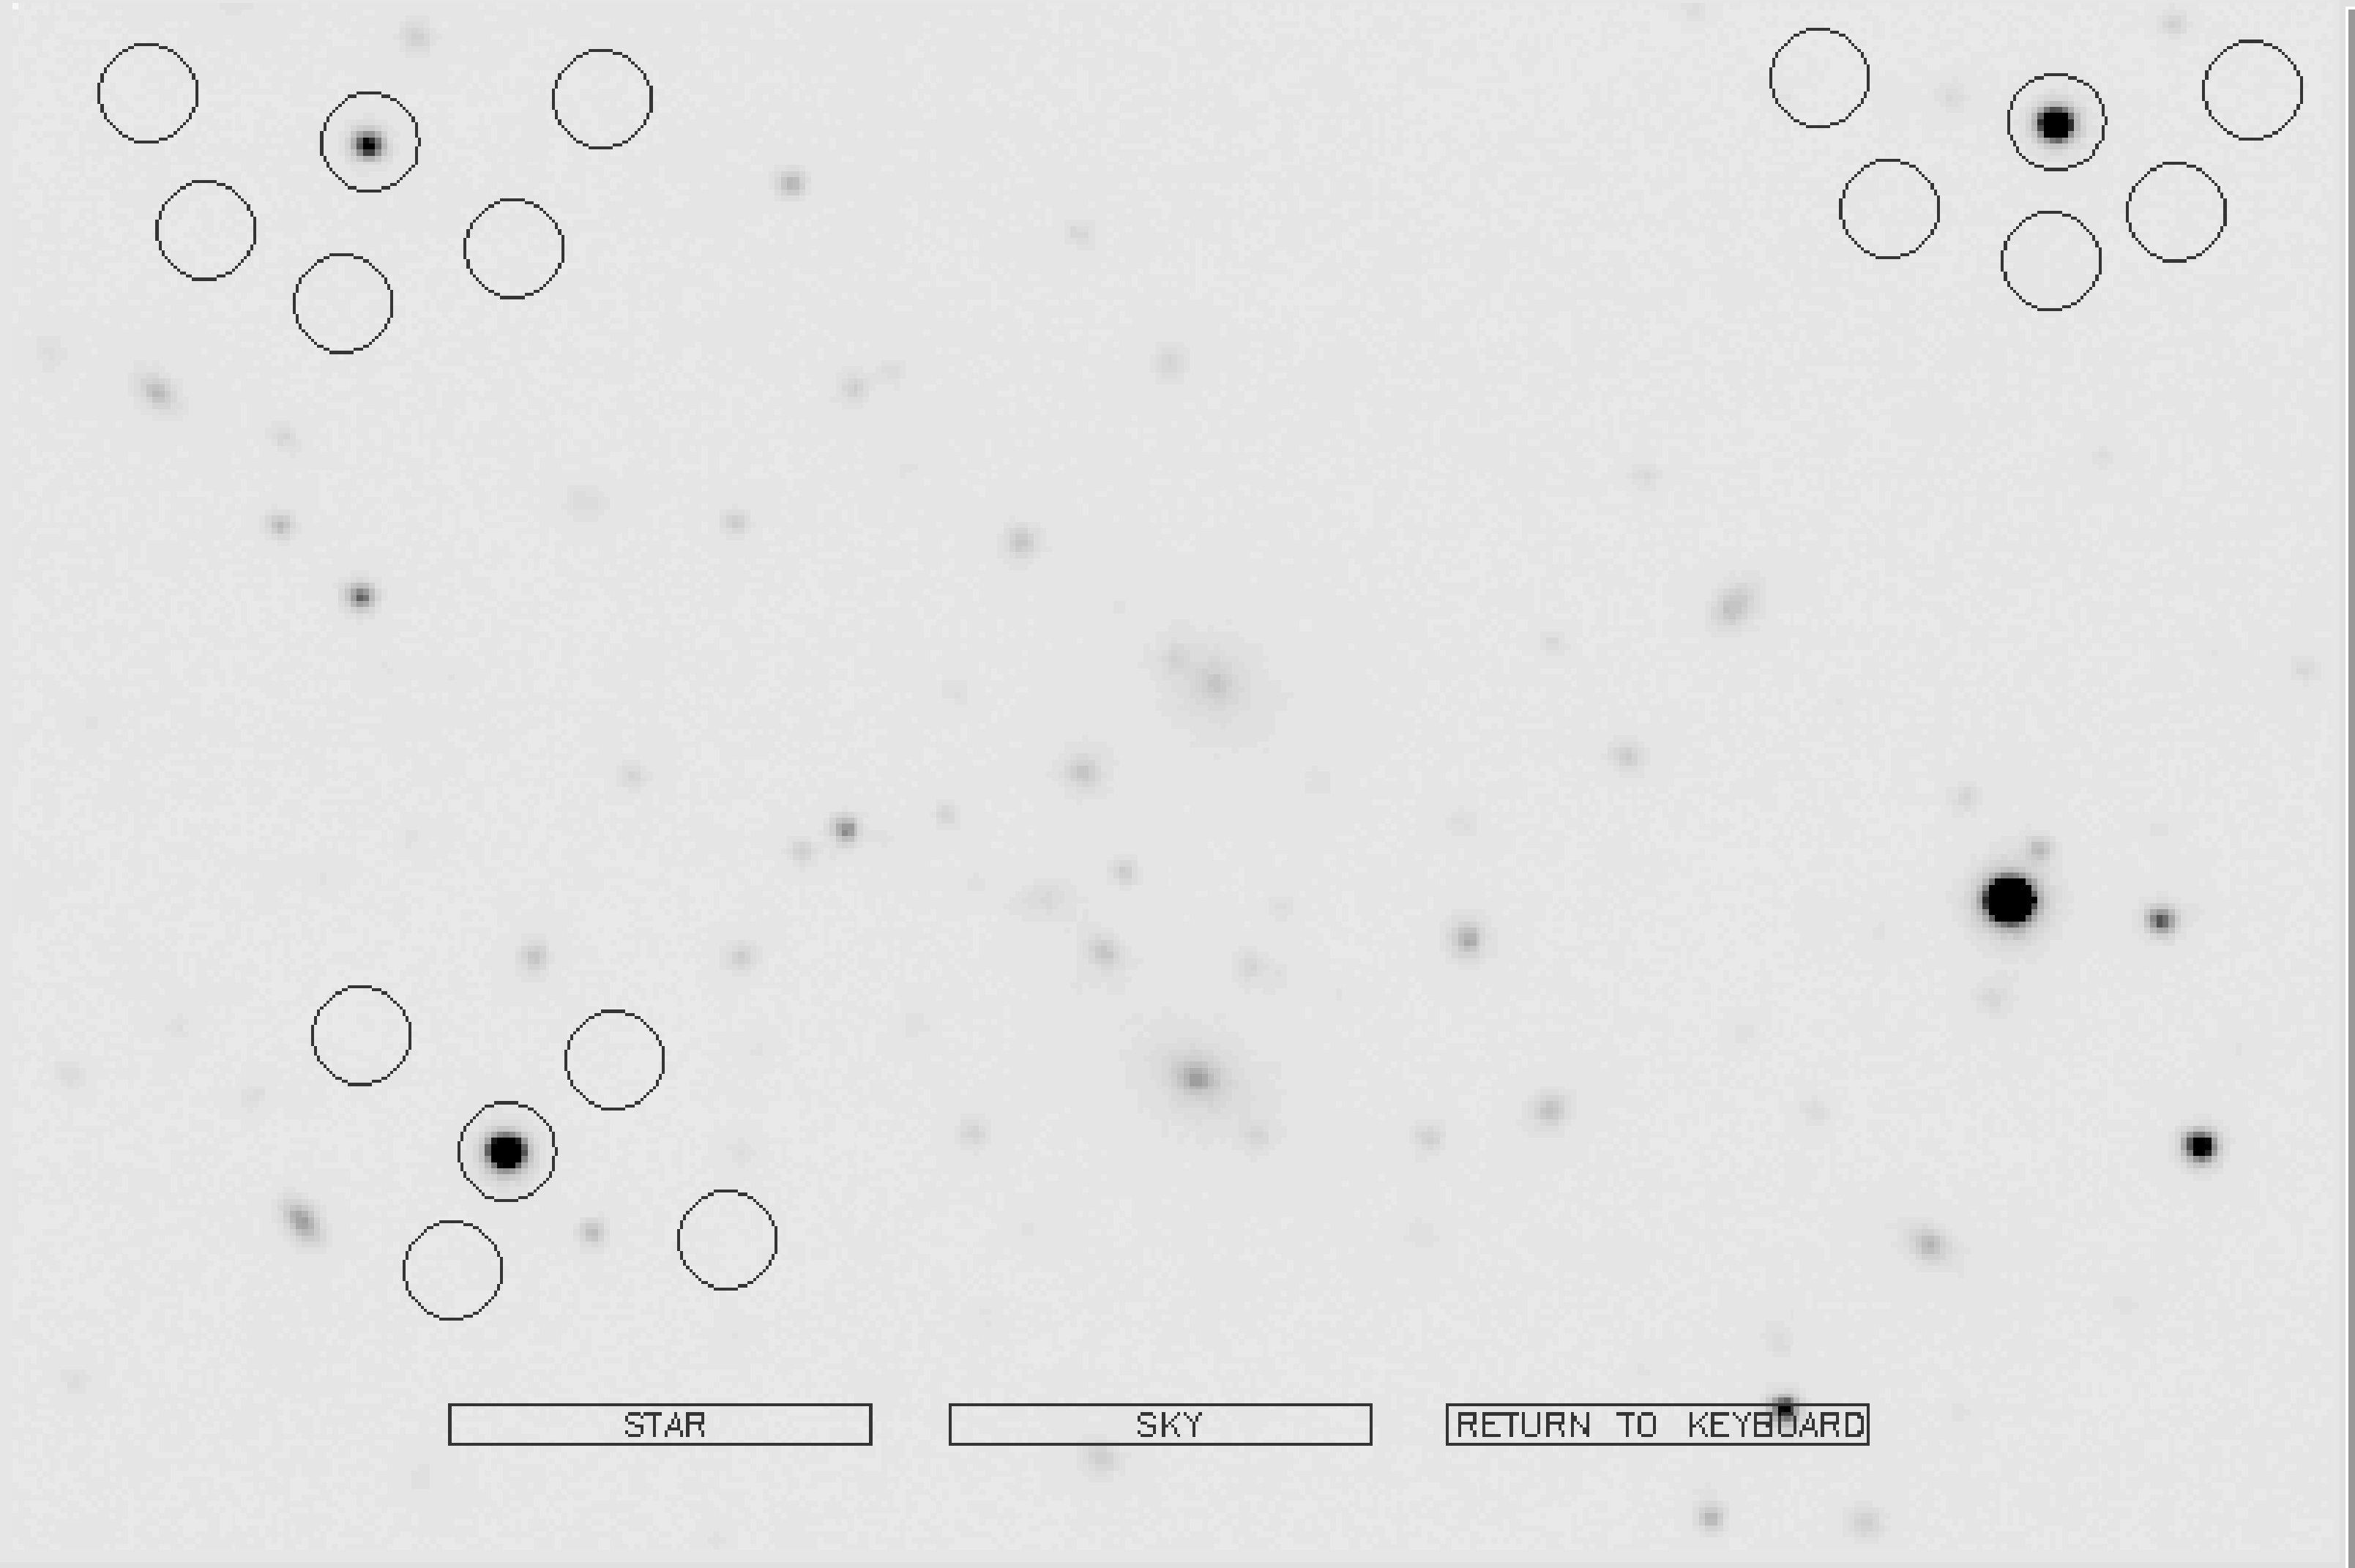
- Move the cursor to a blank patch of sky. Usually the patch chosen will be close to the object to be measured. Click on the middle mouse button. An aperture corresponding to the patch of sky measured will be shown. You can repeat this procedure for several patches of sky if you wish. Note that the sky must be measured before measuring any objects.
- (d)
- Move the cursor over the object to be measured and click on the left mouse button (or enter 1 from the keyboard).
- (e)
- You can make further measurements of the objects and the sky background as you wish.
- (f)
- To finish click on the right mouse button (or enter 0 from the keyboard).
The resulting display will look something like Figure 9.
autophotom which allows PHOTOM to be used non-interactively (see SUN/45[22] for
details).

